Showing posts with label chocolate. Show all posts

Sunday, 12 June 2016

Chocolate Cupcakes


These are quite possibly the best chocolate cupcakes I've ever had. One day I had a craving for a simple chocolate cupcake. Not one that's paired with fruit or caramel or a combination of flavours. Just pure chocolate.  Sometimes simple is best and this is about as simple as it gets. No extra flavours, no hidden surprises just chocolate on chocolate. It definitely satisfied my craving and it was so good I baked a second batch so that J could take some to work.


Makes 12 cupcakes
For the cupcake
185g flour
50g cocoa powder
3/4 teaspoon bicarbonate of soda
113g butter
200g caster sugar
2 eggs
2 teaspoons vanilla extract
1/2 cup or 125mls milk
1/2 cup or 125ml hot water

For the frosting
150g butter
160g icing sugar
25g cocoa powder
1 teaspoon vanilla extract
115g dark chocolate, melted
2 tablespoons cream


  • Preheat the oven to 180C. 
  • Cream the butter and sugar until light and fluffy.
  • Add in the eggs, one at a time and then the vanilla extract.
  • Add half of the dry ingredients then the milk.
  • Add the remaining dry ingredients then the hot water.
  • Divide the mixture into 12 cupcake cases.
  • Bake for approximately 15-20 minutes or until a skewer inserted into the centre comes out clean.
  • Allow to cool completely before frosting.
  • To make the frosting, beat the butter and icing sugar together until smooth. 
  • Add the cocoa powder followed by the melted chocolate and mix well.
  • Finally add in the cream and whisk further until the icing is smooth and glossy.
  • Pipe the chocolate icing on top of the chocolate cupcakes and decorate with sprinkles. 


Wednesday, 25 May 2016

Chocolate Fudge Cake


Hi everyone! Sorry for the long absence. Life has just been crazy lately and I've also lost my baking mojo :( I hope it will come back soon as I do enjoy baking and everyone keeps asking me where's the cake? I will however have to step back from blogging for the time being but I hope to come back to it in full swing at a later date.

This is a really simple recipe from the Queen of baking, Mary Berry. The letter for this month's AlphaBakes is F so I decided to bake a simple chocolate fudge cake. Looking back on my blog, I can't believe I've not baked one before! This is a really quick and simple recipe with great results. The cake was light, moist and chocolatey and the ganache was divine. It went down really well at J's office and I'm sure I'll be baking this again in the future. 

I'm sending this to AlphaBakes hosted by myself this month and co-hosted by Caroline from Caroline Makes. The letter this month is F for Fudge cake. 


 mix cocoa powder with boiling water 

 mix all the ingredients together and you're done! 


I decorated mine with white chocolate stars 


I used this recipe which I found online so I won't reproduce it here.

Thursday, 21 April 2016

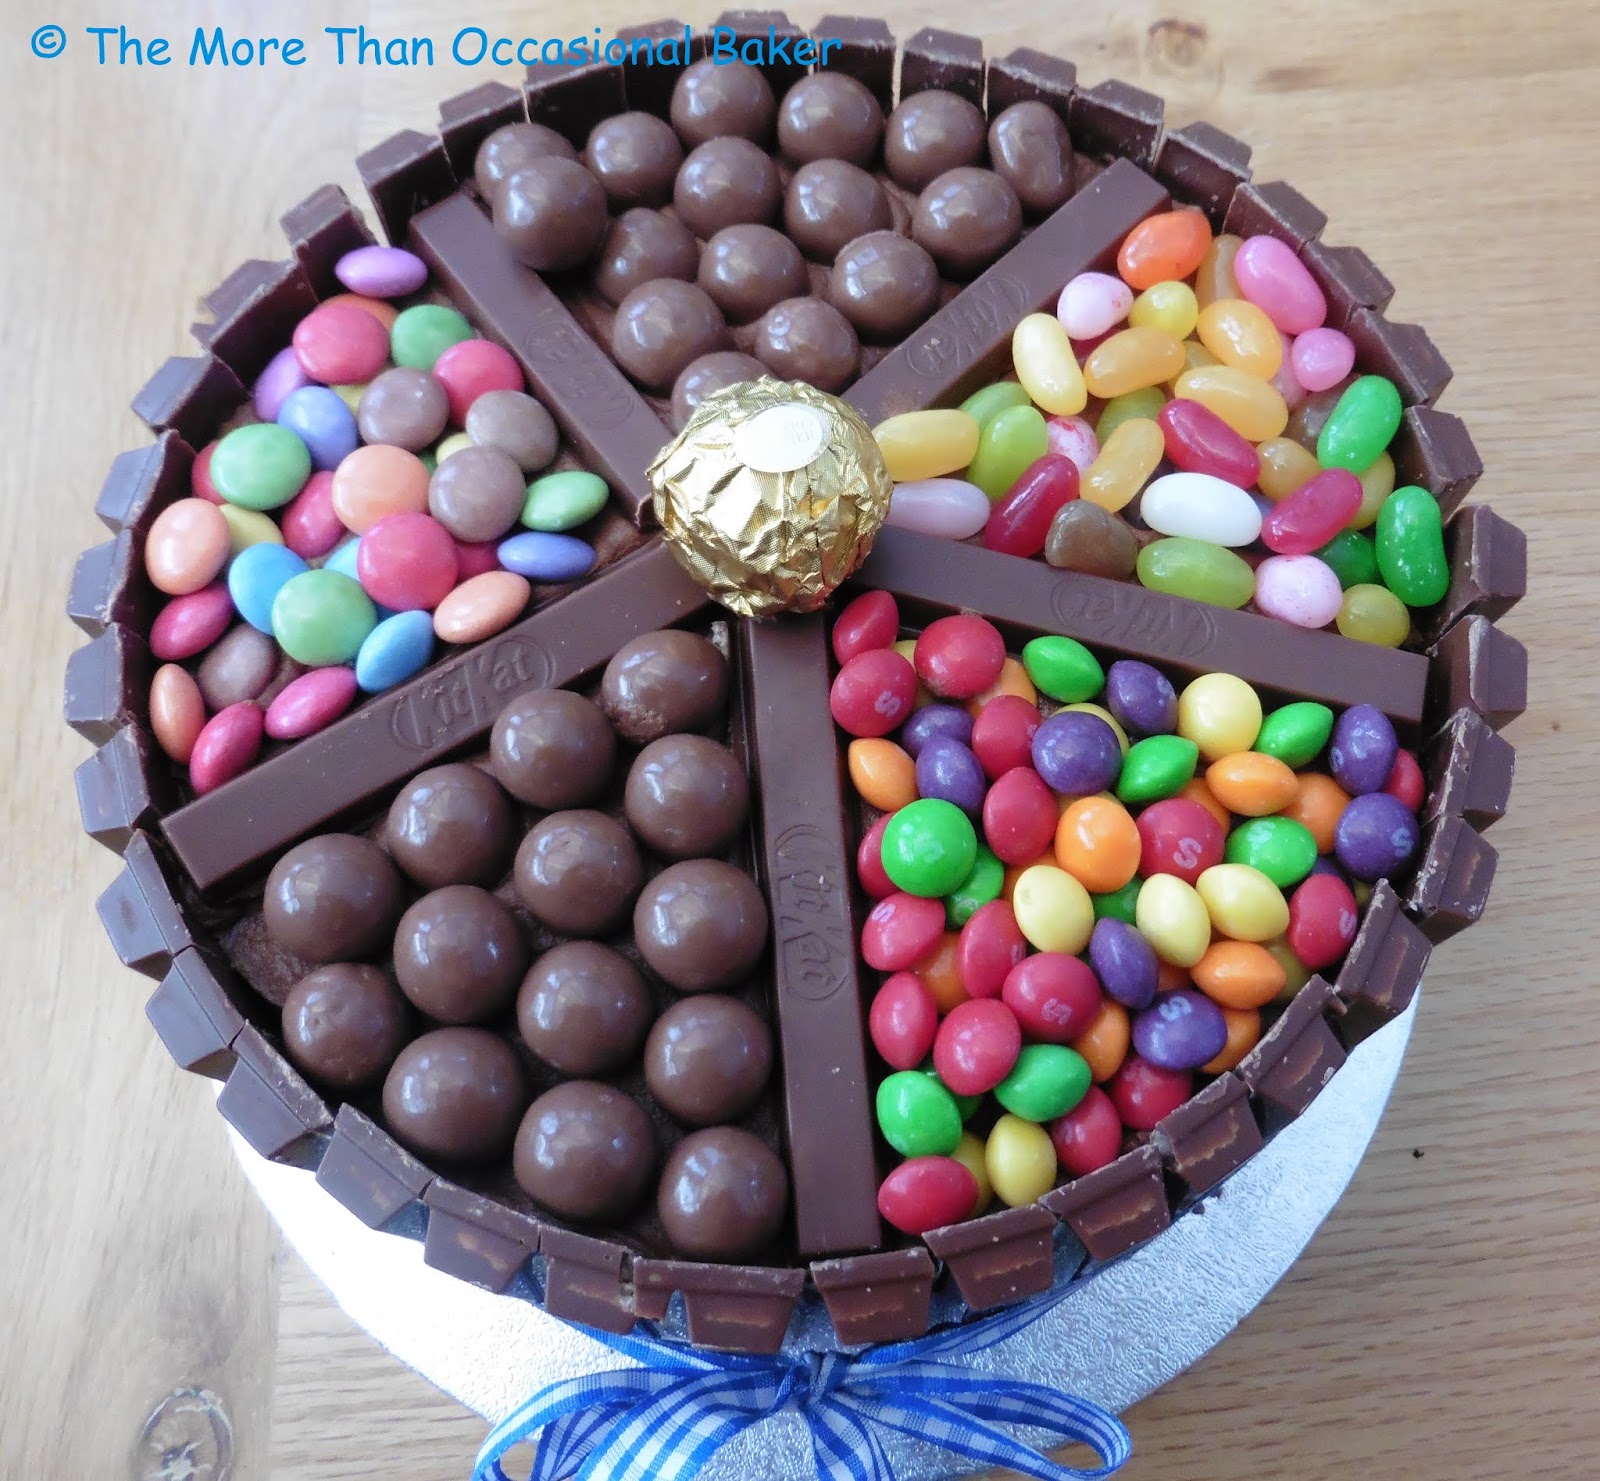
Chocolate Sweet Shop Cake

Kit Kat, candy cake

A really quick post today as I'm currently on holidays and will be travelling for the next few weeks. I made this for a colleague's son's birthday. Looking back, I've made his birthday cake for the past 3 years (Bin Weevils, Trash Pack, Football Pinata Cake) and they've always been a huge success.  He told his mum that he didn't want a shop bought cake, only a Ros cake! Well how could I disappoint? He initially asked for a playstation 4 cake but my cake decorating skills do not extend that far and I was really pressed for time. Instead I made this chocolate cake and decorated it with Kit Kat fingers, Maltesers, Jelly beans, Smarties and Skittles. He was absolutely delighted with the cake and wrote me a really sweet thank you note which you can see below. 


The cake and buttercream is the same as the Chocolate Easter Cake I made earlier this year and the decorations are as simple as they look here. A short blog holiday for now, see you back in mid-May!

Kit Kat, candy cake

Kit Kat, candy cake

Sunday, 20 March 2016

Chocolate Easter Cake


Can you believe it's a week till Easter? I know it's early this year but it still seems to have come out of nowhere. I have great plans for Easter baking but I'm not sure if I'll get round to all of it! Thankfully I have an Easter themed cake to share with you today and will definitely be baking a few more in the next week! This cake is a chocaholic's dream and is sure to impress both adults and children. It has a light chocolate sponge sandwiched with chocolate buttercream, surrounded by Kit Kats and is topped with mini eggs and a chocolate bunny and a chocolate duck made from Belgian chocolate. I bought the chocolate figures from my recent trip to Belgium and they taste as good as they look. For my cakes next week I'm going to use Lindt chocolate bunnies, Cabdury milk bunny and a Cadbury Chick. 

I'm sending this to several blog challenges this month.

AlphaBakes hosted by myself and Caroline from Caroline Makes. The letter this month is C for Chocolate. 


We Should Cocoa guest hosted by Linzi from Lancashire Food on behalf of Choclette from Tin and Thyme. The theme this month is eggs. There's real eggs in the cake and chocolate mini eggs in the decoration! 


Simply Eggcellent hosted by Dom from Belleau Kitchen. As mentioned there are real eggs in the cake and lots of mini eggs on top! 


Tea Time Treats hosted by Janie from The Hedgecombers and Karen from Lavender and Lovage. The theme this month is Easter.


#FoodYearLinkUp hosted by Charlotte from Charlotte's Lively Kitchen. This cake is definitely for Easter!


  Chocolate cakes, chocolate frosting, Kit Kats, mini eggs and chocolate figures 


 Spread a thick layer of frosting on top of the cake 

 Add another layer of cake on top and cover the cake - top and sides with frosting. Don't worry if it look messy as it will all be covered in chocolate candy. 

 I love these Chocolate figures I bought from Belgium - so cute! 

 Add Kit Kat Bars around the edge to form a fence. Place the chocolate figures in the centre then scatter mini eggs on top making sure to cover all the gaps and finish with a ribbon round the cake! 


 delicious! 

For the cake
220g plain flour
300g caster sugar
85g cocoa powder
1.5 teaspoon baking powder
1.5 teaspoon bicarbonate of soda
2 eggs
1 cup/250mls milk
1/2 cup/ 125mls vegetable oil 
2 teaspoon vanilla extract
1 cup boiling water, slightly cooled 

For the icing
150g butter
160g icing sugar
25g cocoa powder
1 teaspoon vanilla extract
115g dark chocolate, melted
2 tablespoons double cream (optional)

For the decorations
Approximately 38 Kit Kat fingers
250g mini eggs
Chocolate figures


  • Preheat the oven to 180C.
  • Grease and line 2 x 18cm sandwich tins. 
  • Mix all thedry ingeredients for the cake in an electric mixer. 
  • Add in the eggs, milk, vegetable oil and vanilla extract.
  • Beat well then add in the boiled water. The batter will be very liquid - don't worry!
  • Divide the batter evenly between the 2 cake tins and bake in the pre heated oven for 30-35 minutes or until a skewer inserted into the centre comes out clean. 
  • Allow to cool for 5 mins in the tin before turning out to a wire rack to cool completely.
  • To make the frosting, beat the butter and icing sugar until smooth. 
  • Add the cocoa powder and mix well.
  • Add vanilla extract and melted chocolate and beat until smooth.
  • Finally add in the cream if using. 
  • To decorate the cake, place a small dab of frosting in the centre of a cake board.
  • Place one cake bottom side up on the cake board.
  • Spread a generous layer of frosting and even the top with a palette knife.
  • Place the second cake on top and spread frosting on the top and sides of the cake.
  • Don't worry if its a little messy and you get cake crumbs in the frosting.
  • Use the Kit Kats to create a fence around the cake as shown. 
  • Place the chocolate figures in the centre or wherever your choose and press down gently.
  • Scatter the mini eggs on top, pressing lightly to secure them to the cake. 
  • Finish the look by tying a large ribbon around the cake. 


Monday, 8 February 2016

Chcocolate Peanut Butter Monkey Cake


Happy Chinese New Year! Today is the first day of the lunar calendar and it's the year of the Monkey. Wishing all my readers good health, prosperity and happiness. We had a little party at the weekend to celebrate the occasion. As it's a monkey year, I decided to make a monkey cake. Unfortunately I didn't deocrate it in time for the party so J has taken it to work today to share with his colleagues. It's a chocolate cake filled with peanut butter frosting. The decoration is simple yet effective albeit a bit messy to decorate! If you have kids, they will definitely enjoy decorating this cake with you. Chinese New Year goes on for 15 days so you have plenty of time to impress your family and friends with this cake. 

I'm sending this to #FoodYearLinkUp hosted by Charlotte from Charlotte's Lively Kitchen for Chinese New Year. 


It's also going to Love Cake hosted by Ness from Jibber Jabber UK. The theme this month is The Month Of Cake as it's the anniversary of the challenge. 


Finally to Simply Eggcellent hosted by Dom from Belleau Kitchen as the theme this month is Anything Goes. There's 2 large free range eggs in this cake.


 The cake batter is very liquid - don't worry it bakes beautifully. 

 spread peanut butter frosting on top of the first layer of cake 

 Add second layer of cake. I used a cocktail stick to roughly draw an outline of a monkey face. I'm terrible at drawing!! 

 Spread the peanut butter frosting where the monkey face will be 
 
 Carefully spread the chocolate ganache over the rest of the cake including the sides

 Press chocolate rice cereal on to the chocolate ganache. I used 2 white candy melts for the eyes and piped some chocolate ganache for the eye balls, nose and mouth (which was a littlewonky!) The ears are tiny as I didn't have any ginger biscuits at home and used golden Oreo cookies instead. 

Recipe from Bird on A Cake 
I reduced the sugar amount, substituted chocolate extract for vanilla extract and used more milk in the frosting 

For the cakes 
1 cup (250mls) boiling water
350g caster sugar
220g plain flour  
85 cocoa powder, sifted
2 teaspoon bicarbonate of soda
1 teaspoon baking powder
2 large, free range eggs
1 cup (250mls) buttermilk
1/2 cup (125mls) vegetable oil
1 teaspoon chocolate extract 

Peanut butter frosting
250g smooth peanut butter
113g butter
250g icing sugar
40-50 mls milk

Chocolate Ganache
175g dark chocolate 
80mls double cream
20g butter

To decorate
2 white candy melts
2 large cookies for the ears - I used golden oreos but they are too small, recommend ginger biscuits or digestive biscuit
Choco rice cereal 

  • Preheat the oven to 180C. 
  • Sift the flour, sugar, cocoa powder, bicarbonate of soda and baking powder in a bowl.
  • Place the dry ingredients in the bowl of a stand mixer and add in the eggs, buttermilk, oil and chocolate extract.
  • Mix well.
  • Slowly pour in the water and continue mixing at a low speed until you have a smooth mixture. 
  • The batter will be very liquid, this is normal.
  • Divide the batter evenly between 2 sandwich tins and bake for approximately 30 - 35 minutes or until a skewer inserted into the centre comes out clean.
  • Allow the cakes to cool for 5 minutes in the tin before turning out to a wire rack to cool completely.
  • To make the peanut butter frosting, beat the peanut butter and butter until smooth.
  • Add in the icing sugar and continue beating.
  • Slowly add in the milk with the mixer running.
  • You  may need to add a little more or a little less of the milk depending on the consistency of your icing. You want a smooth, spreadable paste. 
  • To make the chocolate ganache, place the cream in a small saucepan and heat gently until bubbles are just visible. 
  • Add in the chocolate and whisk until smooth.
  • Remove from the heat.
  • Add in the butter and continue whisking until smooth.
  • Allow to cool and set a little before using.
  • Decorate the cake as shown above. 


Monday, 21 December 2015

Baileys Chocolate Cheesecake Trifles


This is my last blogpost before the Christmas holidays. My blog will be taking a short break and normal services will resume towards the end of January.  Baileys and Christmas are synonymous and it just isn't Christmas without  Baileys! These Baileys chocolate cheesecake trifles are really quick and easy to make and are guaranteed to be a hit at your Christmas parties. You can make them in a large dish to be served family style or serve them in small individual dishes. We had them at our Christmas drinks with our neighbours and everyone thoroughly enjoyed them. It's full of Baileys and has a lovely creamy richness from the cream cheese and whipped cream. The Oreos add a lovely crunch and chocolatey boost.

I'm sending this to We Should Cocoa guest hosted this month by Munchies & Munchkins on behalf of Choclette from Tin and Thyme. The theme this month is Christmas and as mentioned earlier, Baileys and chocolate pretty much equal Christmas to me! 


Wishing everyone a very Happy Christmas and a wonderful New Year! See you all back in Jan 2016 when I will be hosting AlphaBakes.

 cream cheese, cocoa powder, Baileys, whipping cream and oreo cookies 

 Oreo cookie base 


 Cheesecake layer 

 whipped cream layer 


For the cheesecake layer 
450g cream cheese
55g caster sugar
30g cocoa powder
4-6 tablespoons Baileys 

For the whipped cream layer
250mls whipping cream
2-3 tablespoons Baileys
1.5 tablespoon cocoa powder
3 tablespoon icing sugar

Base and topping
15 Oreo cookies, crushed

  • Beat the cream cheese, sugar and cocoa powder until smooth. 
  • Add in Baileys and set aside.
  • In a separate bowl, whip the cream until it starts to thicken then add in the Baileys, cocoa powder and icing sugar and whisk until stiff peak forms. 
  • Assemble the trifles by putting a layer of cookie crumbs at the bottom of each dish. Reserve a few tablespoons for the topping. 
  • Pipe or spoon the cheesecake layer on top of the cookie crumbs followed by the whipped cream layer. 
  • Repeat with a further layer of cheesecake filling followed by the whipped cream filling. 
  • Sprinkle the remaining cookie crumbs on top. 


Saturday, 12 December 2015

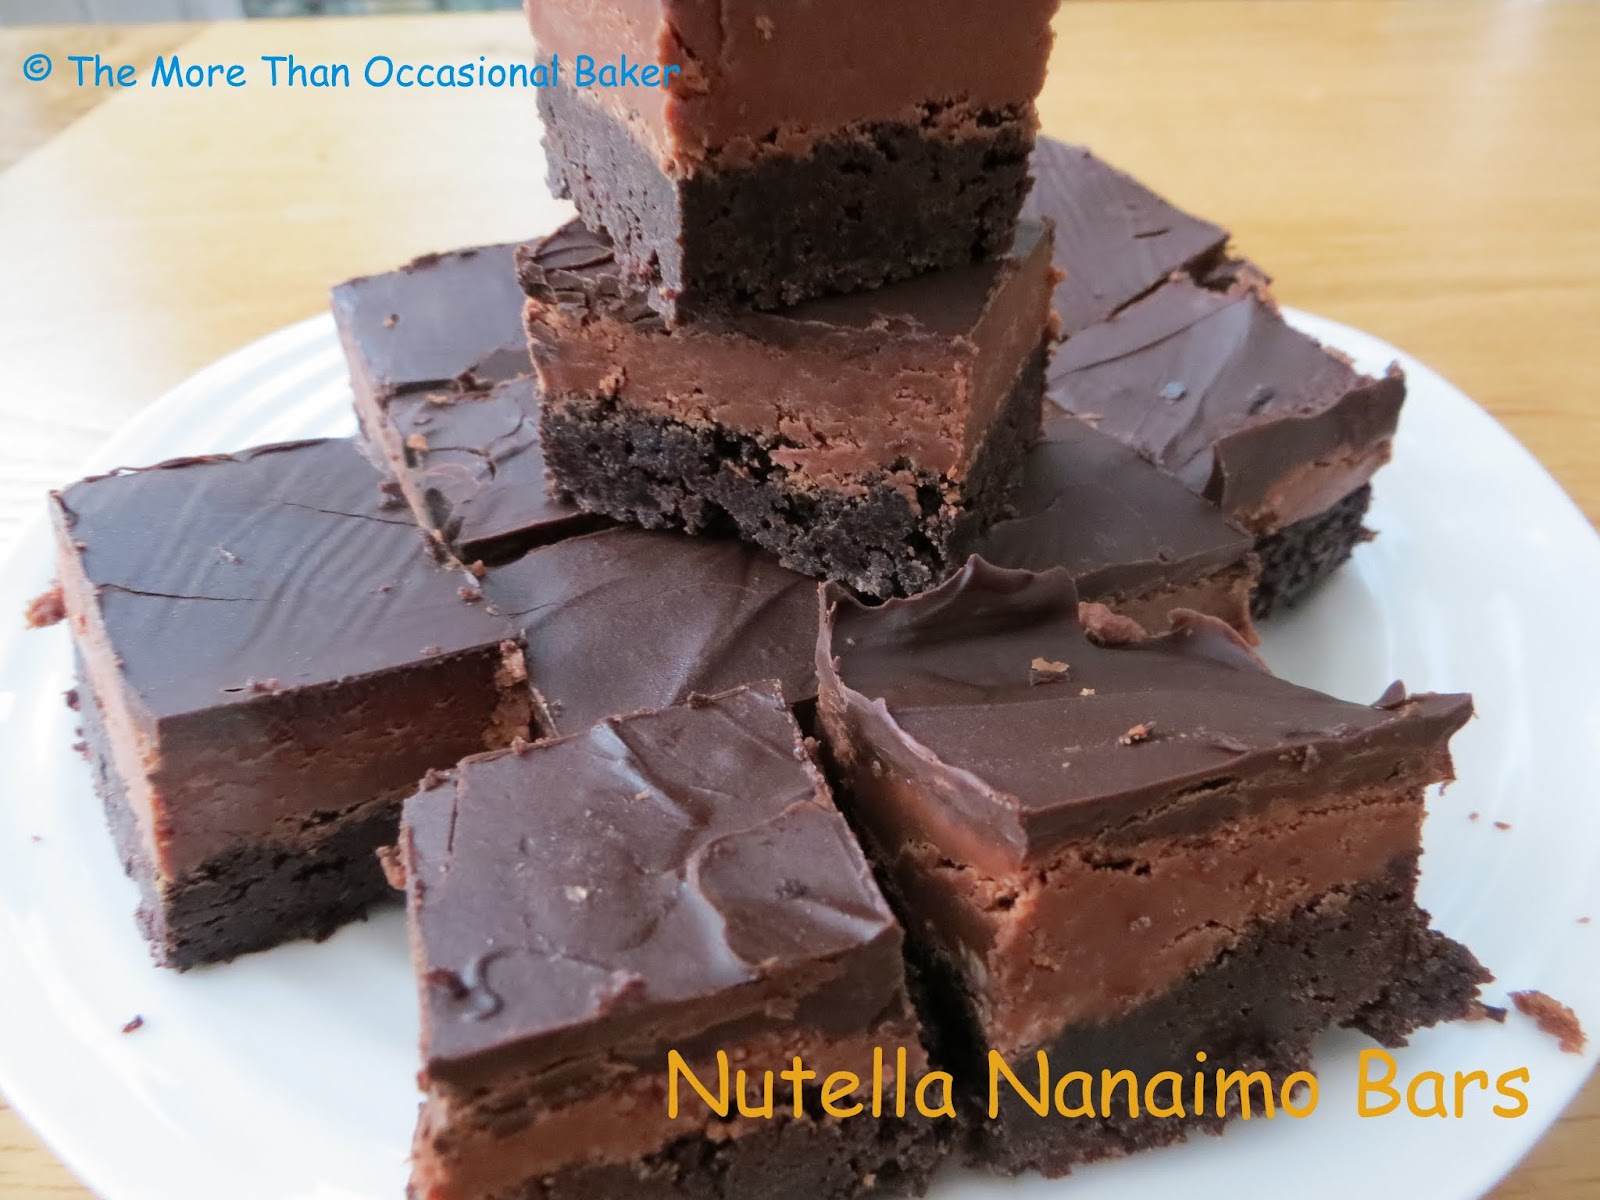
Nutella Nanaimo Bars


This month's AlphaBakes is the letter 'N'. I started thinking about 'N' recipes and decided on Nutella which I love.  I've baked a lot with Nutella and wanted something a little different so when I came across these Nutella Nanaimo bars, I knew I had to make it immediately. I've seen Nanaimo bars on the blogosphere but have never made it myself. It's a no bake dessert bar named after the west coast city of Nanaimo in British Columbia. It usually has a wafer crumb base layer topped with a layer of custard flavoured butter icing and covered with melted chocolate. These of course contain nutella and have an Oreo cookie base. It's sweet and buttery and nutty and oh so naughty. One compliment I received was that "these taste like little explosions of heaven in your mouth". It's perfect for the upcoming festive season as it's quick and easy to make and you can make them in advance. 

I'm sending this to AlphaBakes hosted by Caroline from Caroline Makes and co hosted by myself on alternate months. The letter this month is "N" and I hope I get bonus points for my double N entry ;) 


 making the biscuit base 

 adding lots of lovely Nutella 

 cooked biscuit base 

 Nutella layer 

 add melted chocolate 

 ready to eat 

Recipe adapted from Sweet Twist of Blogging

For the base
2 packs of Oreo double stuff cookies (or regular oreo cookies)
60g caster sugar
50g cocoa powder
115g butter, melted
1 egg
1 teaspoon vanilla extract 
[I wanted to add some chopped hazelnuts but didn't have any in the cupboard]

For the filling
40g butter
110g icing sugar
300g Nutella
1 tablespoon double cream
1 teaspoon vanilla extract

For the topping
140g dark chocolate
10g butter

  • Preheat the oven to 180C.
  • Grease and line a square baking tin. 
  • Place the Oreo cookies in a food processor and blitz until it resembles breadcrumbs.
  • Place in a large bowl and add in the remaining ingredients.
  • Mix well then pour into a square tin.
  • Press down gently and level the top. 
  • Bake for approximately 15 minutes.
  • Allow to cool. 
  • To make the filling, beat the butter and icing sugar until it forms a paste.
  • Add in the Nutella, cream and vanilla extract and mix.
  • Pour onto the cooled base and level with a spatula. 
  • Place in the fridge to chill.
  • Place the chocolate and butter in a bowl over a pan of simmering water.
  • Stir occasionally and once fully melted, remove from the heat.
  • Pour the melted chocolate on top of the chilled filling, tilting from side to side to get an even coating.
  • Cover and chill for a few hours before serving.