
Baked Alaska also known as glace au four, omelette à la norvégienne, Norwegian omelette and omelette surprise is a dessert made of ice cream placed in a pie dish lined with slices of sponge cake or Christmas pudding and topped with meringue. The entire dessert is then placed in an extremely hot oven for just long enough to firm the meringue.The meringue is an effective insulator, and the short cooking time prevents the heat from getting through to the ice cream. February 1 is Baked Alaska Day so I'm a few months late but better late than never, right?
I have never made one of these before but I saw it on TV and decided to try it out for a dinner party as it looked like a wow dessert. It certainly did not fail to impress!
I made 2 miniature and 1 large one and was really pleased with the final result. Another bonus was that I made this in my mum's kitchen. It's slightly disconcerting baking in someone else's kitchen as you're not familiar with equipment etc but definitely a bonus for me because she has a stand mixer which I desperately want. I think there may be a post about this later. Watch this space :)
Back to the dessert. First step is to make the sponge cake. I used a basic sponge cake recipe. You can use a store bought cake to save time or flavour the cake differently to suit your taste. I saw a version using a chocolate brownie base which looked good too.

Next step is the ice-cream. You need to freeze the ice cream in the shape of your cake base. Line the bottom of your bowl with clingfilm for easier removal. I made 1 large round one and 2 smaller shaped ones.


Make sure your shaped ice cream is well frozen - at least 2 hours. Place the shaped ice cream on top of your cake base.
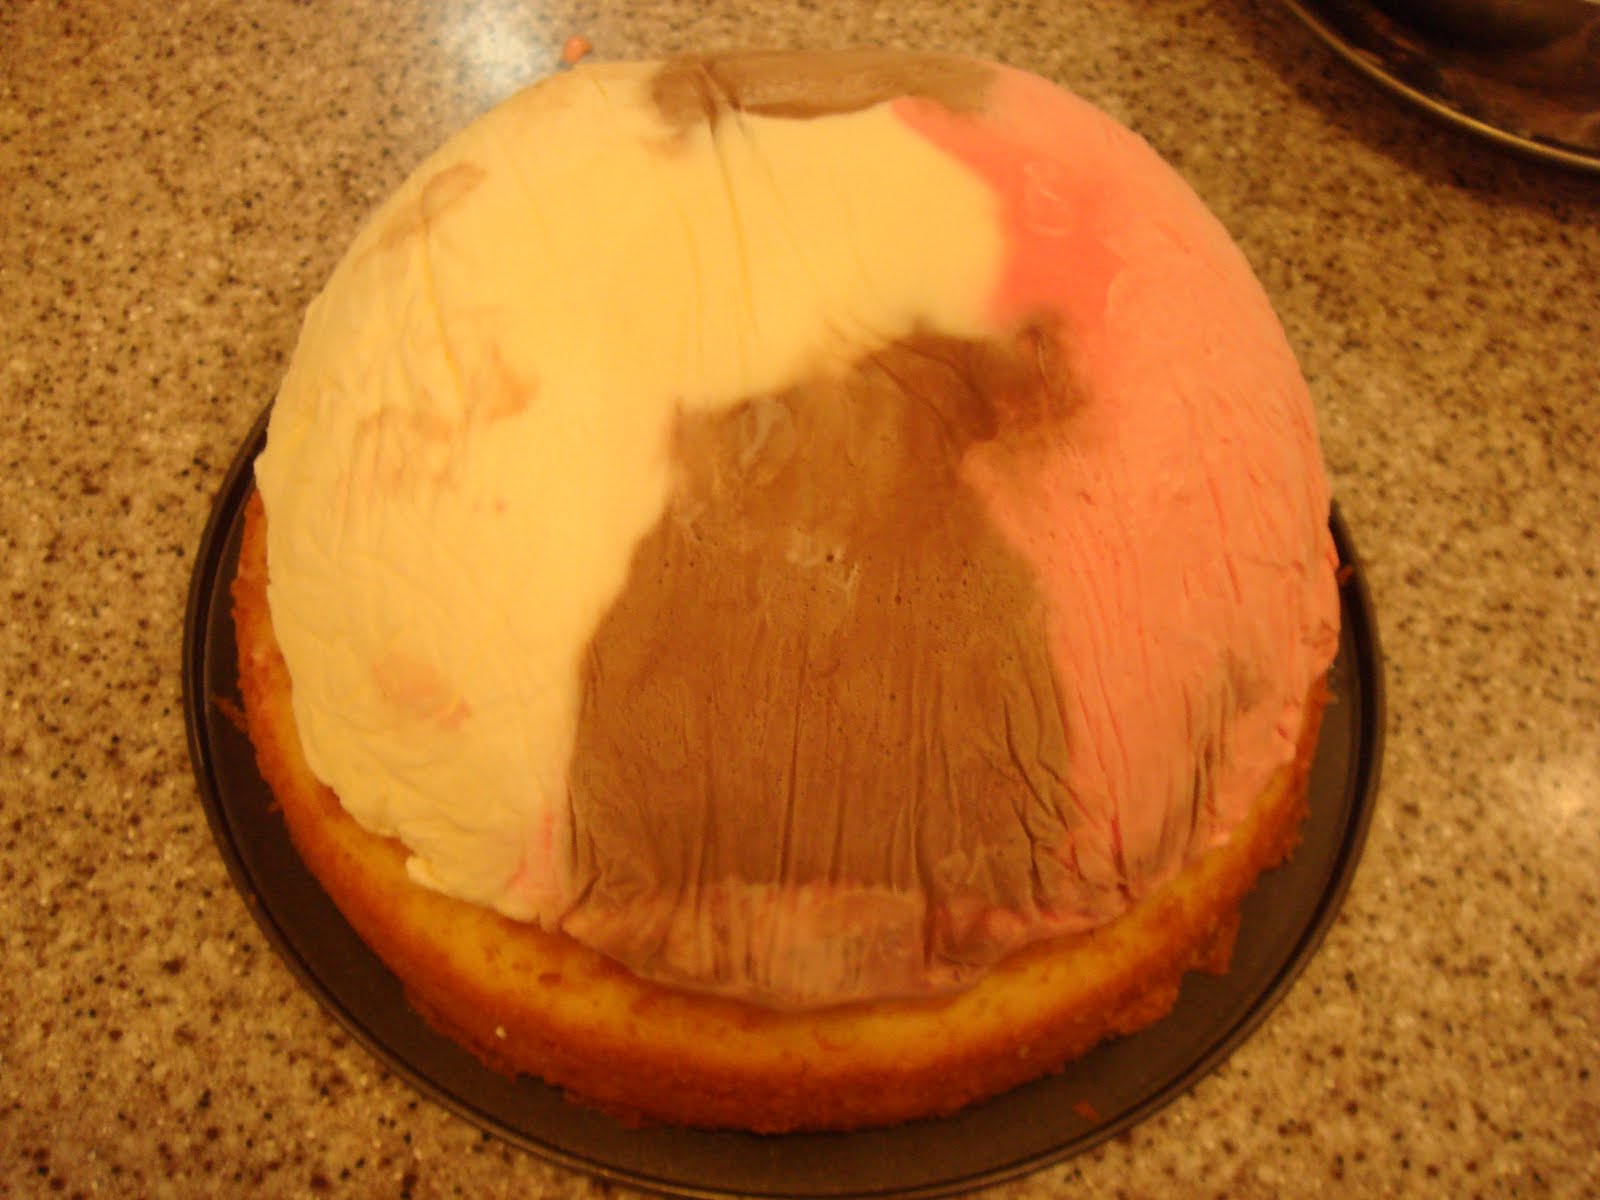 Vanilla, chocolate and strawberry ice-cream
 Coffee cream
I got to use one of my favourite kitchen gadgets - this nifty egg separator to make the meringue.


Working quickly, cover the ice-cream and cake with a generous layer of meringue. Make sure it completely encases the dessert as the meringue acts as an insulator.
 Should have just made these round to save time as you can't really see the shape under all that meringue! Live and learn :)
Place in the freezer again for a minimum of 30 minutes so that it's nice and firm. Bake in a very, very hot oven for a few minutes until brown or you can use a blow torch if you have one.


 I love the effect of the tri-coloured ice cream.
For the sponge
225g butter, softened
225g caster sugar
225g self-raising flour
3-4 eggs (depending on size of eggs)
Grated zest of 1 orange (optional)
1 tablespoon of freshly squeezed orange juice (optional)
For the meringue
8 egg whites
1 cup sugar
1 teaspoon cream of tartar
To make the sponge :
Combine all the ingredients (ideally with a mixer) until smooth.
Pour into a lined cake tin and bake in a pre-heated oven at 180C for about 20-25 minutes until golden brown.
Allow to cool in tin for 5 minutes before turning out onto a rack to cool completely.
To make the meringue :
Beat the egg whites and cream of tartar until frothy.
Slowly add the sugar and continue beating until stiff peaks form.
To assemble dessert:
Shape ice cream if desired (using moulds) and freeze until solid.- For the traditional dome shape, line a bowl with clingfilm. Fill with softened ice cream until it's packed tightly with no air bubbles. Ideally the diameter of your bowl should be slightly less than the diameter of your cake base. Freeze until solid.
Place shaped ice cream on top of cake base.
Cover the ice-cream and cake fully with meringue ensuring the bases are fully covered. You need to work quickly to prevent the ice cream melting and making a mess.
Freeze again for a minimum of 30 minutes, ideally a few hours or overnight.
Preheat oven to 240C or as hot as your oven will go.
Place frozen dessert on a baking tray and bake for 3-5 minutes until browned.
Remove from oven and serve immediately.
Tip :use a sharp knife dipped in hot water to slice dessert.
YOur baked alaska is HUGE - I love it!
ReplyDeleteThis is something I've always wanted to make - thanks for such an inspiring post!
Thanks :) I should rename this supersized baked alaska. It was made for 12 people but could probably feed a few more!
ReplyDeleteWow, I am so impressed. I'd never even attempt a recipe like this. You've done an awesome job.
ReplyDelete*kisses* HH
SIGH, how I wish I have a big freezer!! Such a yummy yummy dessert to make. Well done for taking so much steps to make a lovely recipe!!Mmmmmmmmmm
ReplyDeleteThat looks great! I like the step-by-step photos. I may have to try this in the summer!
ReplyDeleteWe had tri-colored Baked Alaska on our cruise just the other day. Yours looks just as scrumptious!
ReplyDeleteSplendid looking dessert. I don't have a blow torch..so I might have make to with the a very hot oven. Lovely!
ReplyDeleteFantastic! That is an awesome dessert!
ReplyDeleteCheers,
Rosa
Looks wonderful! I'm so fascinated that you can put the ice cream in the oven. It looks great with the different flavors of ice cream!
ReplyDeleteWhen I was young I used to think that Baked Alaksa was the impossible dessert! I never understood how it could happen and always loved the whole idea of it! It looks fantastic-gorgeous hedgehog spikes there! :D
ReplyDeleteThis cake is so tempting!
ReplyDeleteThis looks fabulous! I have always wanted o make Baked Alaska - it's on the to do list.
ReplyDeleteI always thought baked Alaska was some sort fish dish. I guess I was wrong! This looks way better then anything I thought! What a great dessert!
ReplyDeleteyou make it look so easy =)
xoxo
KC
Making a baked alaska was always on my list of to-do desserts, but somehow actually making it always eluded me! You have done a superb job with it, especially with all the cake layers, it makes it even doubly dramatic and fun!
ReplyDeleteWow, this is awesome! I was thinking to make something like this too but have never thought of using ice-cream. You are super! Have to salute you for this. Good job! Have a great day!
ReplyDeleteRegards, Kristy
love it, absolutely delicious looking.
ReplyDelete