Showing posts with label buttercream. Show all posts

Sunday, 6 April 2014

Minecraft Birthday Cake


I've had a few cake orders from work this month mainly for children's birthdays. The first is this Minecraft Cake for Josh who turned 8 yesterday so Happy Belated Birthday! I had no idea what Minecraft was so I had to learn quickly! Essentially it's a game about making and placing blocks. You then build structures and there are different 'characters' in the game like Creeper, pig and chicken all of which I made from fondant icing. I wanted to make Steve as well but I ran out of time!  I did some research online and came up with this cake which I am pleased to announce was a huge success. Josh was really impressed with the cake and to be honest so am I! I really wasn't sure I could pull it off but I think it's not too bad for a first attempt. Just don't look too closely at the imperfections!! 

He wanted a vanilla sponge with strawberry jam so I baked 2 large square cakes (6 egg sponge x 2) and made 4 layers using strawberry jam and vanilla buttercream to sandwich the layers together. I then made some chocolate frosting by adding melted chocolate to the buttercream and used that to cover the outside of the cake. The 'crumbs' is made from crushed oreo and rich tea biscuits which actually gives it a slight pixelated effect which I was hoping for. The top is covered with a piece of green fondant covered with green buttercream and green coconut which resembles the grass. The figures are made from ready rolled icing and I shaped them by hand using pictures from the internet as a guide. 

The entire cake took 2 evenings to make. I baked the cakes and made the fondant figures on day 1 and assembled the cake on day 2. Top tips - either use a large roasting pan or place a large piece of parchment paper over your worktop before pressing the crumbs on the cake. This makes it much easier to clean up the mess after! Place the dessicated coconut in a ziplock bag, add the food colouring and seal the bag then give it a good shake to get green 'grass' - no mess and no washing up! Remember to save some vanilla buttercream to make green buttercream before adding the melted chocolate as it's quite difficult to make brown green afterwards! 

As this contains strawberry jam in the middle of the cake layers I'm sending it to Tea Time Treats hosted by Karen from Lavender and Lovage and co hosted by Jane from The Hedgecombers. The theme this month is jams, curds and preserves. 


 weigh eggs in their shell and use the same amount of flour, butter and caster sugar for the sponge.

 I baked 2 cakes in my square tin 

 making the layers with strawberry jam and vanilla buttercream 

 This is going to be a tall cake! 


 cover with chocolate frosting on the outside but not the top 

 I drew this pattern freestyle on a piece of parchment paper - the square is the size of my cake tin and I made random blocks around the edges 

 cut out the pattern and place it on top of rolled green fondant and cut out the pattern with a sharp knife 

 ready to go on top of the cake 

 slightly wonky but it's starting to look like a minecraft block! 

 cover the fondant with green icing then cover with dessicated coconut which has been dyed green to resemble grass. 

 Place the figures on top using a toothpick to support them. I used cutters to cut out the name and age - his favourite colour is green but you can of course using contrasting colours to make it stand out more. 


Thursday, 2 January 2014

Happy Blogoversary and Happy New Year


Happy New Year everyone and Happy 4th Birthday to my blog! I really can't believe that it's been 4 years since I started this blog. It has gone from strength to strength and I have all of you to thank. I've met so many fantastic bloggers through this blog - some on their blogs, some via twitter and some in person! A year ago I wrote that 2012 was a great year for my blog and I planned to take a slower pace in 2013 due to other commitments. I've certainly blogged less, a total of 113 posts compared to 166 in 2012 but it didn't feel like I baked any less! I managed to expand my repertoire a little and venture outside my comfort zone mainly in baking pastry and trying out a few unusual flavour combinations and ingredients. 

I'm not sure yet what direction my blog will take in 2014 but I do know that I definitely want to keep it going. I guess we'll all have to wait and see :) 

Right no more long soppy messages or reflections, on to the cake! This was actually a cake I made for a colleague who told her husband she wanted to be treated 'like a princess for a day" So it was decided (by my team!) that I would bake a big pink cake and I chose to make this giant vanilla raspberry cupcake cake. It has fresh raspberries in the batter and raspberry jam in the middle. It's decorated with white chocolate fingers, piped buttercream roses, wafer butterflies and coloured sugar pearls and some edible glitter. The finishing touch is the pink satin ribbon. Everyone was really impressed with the presentation of the cake and it tasted heavenly. Light and soft sponge with lovely tart raspberries. A perfect celebration for a birthday - for my colleague and for my dear blog. It also looks much better than my previous attempt so I'm doubly pleased with myself. 


 I love fresh raspberries! I know it's not seasonal but it's just so pretty and tasty too. 

 ready to go in the oven 

 looking good 
 Fill with raspberry jam 

 spread buttercream around the cake and arrange white chocolate fingers around the base 

 ready to be decorated 

 view from the top 

 can you see the edible glitter? 


This recipe makes 1 giant cupcake and 6 small cupcakes - be careful not to overfill the giant cupcake mould! 

For the cake
375g butter
375g sugar
6 eggs
375g self raising flour
1 teaspoon vanilla extract
1 teaspoon vanilla bean paste
150g fresh raspberries

For the icing
300g icing sugar
120g butter
1 teaspoon vanilla extract
2-4 tablespoons of milk
pink gel paste (optional)

For the filling and decoration
Raspberry jam
White chocolate fingers (about 1.5 boxes) 
Sprinkles
Edible glitter
Pink satin ribbon

  • Preheat the oven to 180C.
  • Cream butter and sugar until pale and fluffy.
  • Add the eggs one at a time and mix well between each addition.
  • Mix in the flour and vanilla extract.
  • Finally stir in the fresh raspberries.
  • Fill the cupcake mould until 2/3 full - do not overfill!
  • Bake for approximately 40-45 minutes or until a skewer inserted into the centre comes out clean.
  • Allow to cool completely.
  • Sandwich the top and bottom with raspberry jam.
  • Make the icing by beating all the ingredients together until smooth. 
  • Decorate as shown above. 

Monday, 23 December 2013

Chocolate Orange Cupcakes with a hidden surprise


It's been a whirlwind of festive baking here at The More Than Occasional Baker. I also made a lot of festive food gifts which I've not blogged about this time as I have mentioned them in previous years and I don't have time! So this is my last post before Christmas 2013 and I would like to take the opportunity to wish all  my readers a very Happy Christmas and hope it's full of love, laughter and cake :) 

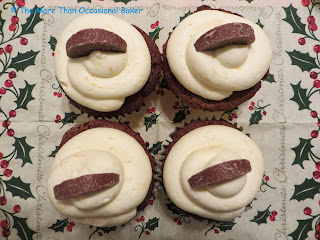
Lots of things remind me of Christmas. One of these is Terry's Chocolate Orange. So this is the cupcake version - chocolate orange cupcake with orange buttercream frosting and a mini chocolate orange slice. It also has a hidden surprise which is reminiscent of a sixpence in your Christmas pud - a gold chocolate coin. Everyone loved the hidden surprise - I should have taken a video of people eating it and their faces when they saw the hidden coin! I have no doubt that kids will be absolutely delighted. I did have to warn everyone that there is something inside as I don't want to be responsible for broken teeth or accidental choking! 

I would also like to mention that this is the first recipe I ever posted on my blog when I started it in 2010. I've not actually made it since then and felt it was worth sharing again as it's just so good and the hidden surprise is brilliant. 

HAPPY CHRISTMAS! 


As usual, I'm sharing this with several blog challenges this month. 


AlphaBakes which I am hosting this month and co host with Caroline from Caroline Makes. The letter this month is X for this Xmas inspired cupcake.


Tea Time Treats hosted by Kate from What Kate Baked and co-hosted by Karen from Lavender and Lovage. The theme this month is Festive Food Gifts and I gave away quite a few of these as gifts.


Calendar Cakes hosted by Rachel from Dolly Bakes and co-hosted by Laura from Laura loves Cakes. The theme this month is Jingle Bell Rock.


 Treat Petite hosted by Stuart from Cakeyboi and co-hosted by Kat from the Baking Explorer. The theme this month is Happy Holidays.


Four Seasons Food hosted by Anneli from Delicieux and Louisa from Eat your Veg. The theme this month is Party Food and these cupcakes would be perfect for any festive party.


Family Fodies hosted by Louisa from Eat Your Veg and Vanesther from Bangers & Mash. The theme this month is Kids Christmas and I'm sure kids will love these hidden surprise cupcakes. They can also help to make the cakes.

Let's Cook Christmas Party Food hosted by Nayna from Simply Food.


Secret Recipe Club Holiday Treats Party


 adding finely grated zest to the buttercream 

 insert gold coins after the cupcakes have cooled slightly 

 pipe buttercream on top 

 finish with a wedge of chocolate orange slice 

 The hidden surprise! You can just see the gold coin under the frosting there.


Chocolate Orange Cupcakes
Makes ~ 15 cupcakes

For the cupcakes
115g good quality dark chocolate
90g unsalted butter, room temperature
175g golden caster sugar
75ml fresh orange juice
zest of 1 orange
2 large eggs
185g plain flour, sifted
1/2 teaspoon bicarbonate of soda
1/2 teaspoon baking powder
1/2 teaspoon salt
1 tablespoon semi-skimmed milk, at room temperature

For the orange buttercream frosting
175g unsalted butter, at room temperature
3-4 tablespoons fresh orange juice
zest of 1 orange
350g icing sugar, sifted

For the filling and decoration
Gold chocolate coins
Mini Chocolate Orange Slices
  • Preheat the oven to 160C 
  • Melt the chocolate over a saucepan of barely simmering water. Set aside to cool.
  • In a large mixing bowl, cream the butter, sugar and orange zest until the mixture is pale and smooth. 
  • Add the eggs and beat again briefly.
  • Combine the flour, bicarbonate of soda, baking powder and salt in a bowl. 
  • Mix the orange juice and milk in a jug.
  • Add the chocolate to the creamed mixture and beat until just combined. The batter will still be streaky. 
  • Add 1/3 of the flour mix and beat until it all just comes together. Add half of the juice/milk mix and beat again until the mixture just comes together. 
  • Repeat these steps until all the ingredients have been incorporated.
  • Carefully spoon into the cupcake cases and bake for about 25 mins until a skewer inserted in the centre of the cake comes out clean.
  • Leave the cakes in the tin for about 10 mins before cooling on a wire rack.
  • To make the frosting, beat together the butter, juice and half of the icing sugar until smooth. Gradually add the remainder of the icing sugar and zest and beat again until smooth and creamy. You may need to add a few more drops of juice depending on the consistency of frosting required.
  • Once the cupcakes have cooled slightly, push a gold coin into the centre.
  • Pipe frosting on top and decorate with a mini wedge of chocolate orange. 

Friday, 25 January 2013

Dog Birthday Cake


Hi everyone! I'm back in London safe and sound. I have been meaning to update my blog for days now but have not gotten round to it. Sorry! It's been quite hectic since my return - catching up with friends, dealing with admin and more importantly looking for a new place to stay. I found a lovely new place and will be moving in this weekend so will be offline until I can get myself set up. Normal blogging services will resume after a few weeks. 

This is a special cake that I made for my brother's birthday a few weeks ago. He loves dogs so the obvious choice was a dog cake. The family pet dog is a silky terrier but my cake decorating skills won't stretch that far so this is what I came up with. Glad he loved the cake! 

 family pet dog


I have to thank Daisy from Never Too Sweet who suggested I look at Not Quite Nigella's blog for inspiration. I  had actually bookmarked the recipe but forgot about it when I was deciding how to make a dog cake. If you used a bit of imagination you could say there is a resemblance between the dog and the cake :) 

I'm submitting this to AlphaBakes a monthly blogging challenge hosted on alternate months by Caroline from Caroline Makes and myself.  The letter this month is "D" for Dog cake. 


 easy swiss roll recipe from my aunt - thank you 

 perfect roll - phew! :)

 adding cupcakes for the head, tail and ears. 

 cover in frosting 

 use a grass tip to pipe "fur" over the dog 


For the face you will need 2 giant chocolate buttons, 3 M&M's and a piece of strawberry rollup cut to shape.   I made some additional decorations using a candy mould I found - bone, food bowl, dog house and  puppy. I also coloured dessicated coconut green to resemble grass. 


 cross section of the swiss roll 

For the swiss roll

4 large eggs, separated
60g self raising flour
55g caster sugar 
1/4 cup milk
1/4 cup sunflower oil 
1/4 teaspoon cream of tartar

  • Preheat the oven to 180C. 
  • Beat egg whites with cream of tartar until stiff.
  • In a separate bowl, mix the egg yolks, sugar, milk, oil and flour until smooth. 
  • Fold into the egg white mixture and spread onto a swiss roll tin. 
  • Bake for 14 minutes.
  • Spread jam or cream and roll into a swiss roll. 


For the peanut butter cupcakes
Makes 12 cupcakes

75g butter
130g smooth peanut butter
190g dark brown sugar
2 large eggs
1 teaspoon vanilla extract
120g plain flour, sifted
1 teaspoon baking powder
pinch of salt
60ml semi-skimmed milk
  • Preheat the oven to 160C.
  • Line a 12-hole muffin tray with cupcake cases. 
  • Cream the butter, peanut butter and sugar until well blended. 
  • Add the eggs, one at a time and then stir in the vanilla extract. 
  • Combine the flour, salt and baking powder in a separate bowl.
  • Add 1/3 of the flour to the creamed mixture and beat well.
  • Pour 1/3 of the milk and beat again.
  • Repeat until all the flour and milk have been added. 
  • Spoon the mixture into the cupcake cases - I used a large ice cream scoop. 
  • Bake for approximately 20 minutes or until a skewer inserted into the centre comes out clean.