Showing posts with label raisin. Show all posts

Monday, 7 December 2015

Apple and raisin muffins with streusel topping


As mentioned before I've been baking a LOT with apples these past few weeks. These muffins came about as I had 1 ripe banana and some apples to use up. I started with a banana and apple muffin and decided to add in raisins, nuts, spice and a streusel topping. The result was a wonderfully delicious and fragrant muffin which made for a perfect breakfast on the go.

I'm sending this to the No Waste Food Challenge guest hosted by Jen from Jen's Food this month on behalf of Elizabeth from Elizabeth' s Kitchen Diary.


 adding wet ingredients to the dry ingredients 

 adding pecans, raisins and apples

 add streusel topping before baking

 yum


 You can clearly see the chunks of apples and the raisins 

 Great breakfast with a nice cup of tea 

Makes 15 muffins 

For the streusel topping
25g flour
85 demerara sugar
1 teaspoon ground cinnamon
50g cold butter
25g pecans, chopped 

For the muffins
100g brown sugar
50g caster sugar
220g plain flour
1 teaspoon bicarbonate of flour
1 teaspoon baking powder
1 teaspoon ground cinnamon
1/2 teaspoon ground nutmeg
1 teaspoon mixed spice
60mls milk
1 ripe banana
80mls vegetable oil
2 large free range eggs
1 pot (165g) Muller light banana and custard yoghurt (or vanilla or apple flavour) 
2 apples, peeled, cored and roughly chopped
100g raisins
75g pecans, roughly chopped

  • Preheat the oven to 180C. 
  • Line 2 muffin trays with 15 muffin liners. 
  • Make the streusel topping by mixing all the ingredients in a bowl by hand. Set aside.
  • In a large bowl, mix the sugars, flour, bicarbonate, baking powder, cinnamon, nutmeg and mixed spice. 
  • In a separate bowl, lightly beat the eggs and add in the mashed bananas, vegetable oil, milk ad yoghurt.
  • Make a well in the dry ingredients and add the wet ingredients. Stir until just mixed. 
  • Add in the apples, raisins and pecans and mix. 
  • Divide the mixture evenly between the muffin cases. 
  • Top with streusel topping and bake in the pre heated oven for 20-25 minutes or until golden brown and a skewer insertedinto the centre comes out clean. 
  • Allow to cool in the tray for a few minutes before removing to a wire rack to cool completely. 


Saturday, 7 November 2015

Apple, toffee, raisin and butterscotch muffins


This is a variation on the toffee apple muffins that I posted earlier in the week. They were so popular I baked them three times in a week! I had further requests but had run out of ingredients. I decided to use up leftovers that I had to create a variation of the muffin and it worked beautifully. Personally I prefer this version as it has butterscotch chips and raisin. J prefers the toffee apple muffins.

I'm sending this to the No Waste Food Challenge guest hosted this month by Tracy from It's Not Easy Being Greedy on behalf of Elizabeth from Elizabeth's Kitchen Diary. This recipe uses up the bits of ingredients in my cupboard - raisin, butterscotch chips and 4 toffee sweets.


It's also suitable for the Credit Crunch Munch challenge guest hosted by Elizabeth from Elizabeth's Kitchen Diary on behalf of Helen from Fuss Free Flavours and Camilla from Fab Food 4 All.


Makes 14 muffins

2 apples, peeled, cored and chopped
1 pot of 165g fat free yoghurt
150mls milk
100g brown sugar
100g butter, melted
300g plain flour
1.5 teaspoon baking powder
1/2 teaspoon bicarbonate of soda
1 teaspoon ground cinnamon
2 eggs
4 toffee sweets, chopped into quarters
100g raisins
100g butterscotch chips

  • Preheat the oven to 180C. 
  • In a large bowl, mix the yoghurt, milk, eggs, sugar and butter.
  • In a separate bowl, sift the dry ingredients.
  • Stir into the wet ingredients until just mixed.
  • Stir in the chopped apples,toffee sweets, raisins and butterscotch chips.
  • Divide the mixture between the muffin cases.
  • Bake for approximately 25-28 minutes or until golden brown and a skewer inserted into the centre comes out clean.

Sunday, 8 June 2014

Maple, walnut and raisin oat cookies and a giveaway


I love maple syrup and have quite a few maple syrup recipes on my blog. The lovely people at Clarks Maple Syrup kindly sent me a selection of their maple syrup to try and they've also agreed to give two lucky readers a Clarks gift bag worth £25. They have a great selection of recipes on their website and you can also download free recipe booklets

I debated about what to make. I usually use maple syrup in pancakes or cakes so I thought about making something a little different. The Clarks Oatmeal Maple Drop Cookies really appealed to me so I gave it a go and was not disappointed with the results. The maple syrup makes for a slightly wet batter and my cookies were soft with a crispy edge. It's definitely a cookie that tastes better the day after and one that slowly grows on you. I love the flavour combination of maple syrup and walnuts. The raisins added contrasting taste and texture and the oats made it feel healthier. I used the Clarks pure maple syrup for this recipe and you can definitely taste it in the cookie. It's not overly sweet and has a lovely aroma. I can't wait to try some of their other recipes. 

As mentioned, 2 lucky readers will win a Clarks gift bag worth £25. Each gift bag will include 

  • 1x 500ml Clarks Original Maple Syrup
  • 1x180ml Clarks Vanilla Maple Syrup
  • 1x500ml Clarks Maple Syrup Pure No.1
  • 1x 180ml Clarks Pure no.2
  • 1x 500ml Clarks clear blossom honey
  • 1x180ml Clarks Lavender honey
  • 1x180ml Clarks Orange blossom honey
  • 1x 180ml Clarks Acacia honey
  • Clarks Recipe book

Entry is via the rafflecopter widget. The prize is sponsored by Clarks and they will arrange delivery of the prize. Competition is open to UK residents only. A winner will be selected at random by Rafflecopter. All entries will be checked and verified and automatically disqualified if it's not a genuine entry. The closing date is 23 June 2014 at 12 midnight GMT. Good luck! 

 My selection of Clarks Maple Syrup

 milk, maple syrup, butter, flour, oats, raisins, egg, walnuts 

 ready to go in the oven

 delicious! 

Disclaimer: I was sent a selection of Clarks maple syrup to review. All opinions expressed are my own. 

a Rafflecopter giveaway

Wednesday, 22 January 2014

Cinnamon, Fruit & Nut Mix Cookies


These cookies are inspired by a pack of fruit and nut mix with cinnamon dusted milk chocolate almonds that I found in the shops. I decided to add in more cinnamon, some chopped chocolate as I had a bit leftover and leftover berry mix (raisins, sultanas and dried cranberries). I also used wholemeal flour and oats to make it seem healthier! They were absolutely delicious. I love the cinnamon which was strong but not overpowering and it was the perfect balance of fruit, nut and chocolate. 

I'm sending this to the Biscuit Barrel Challenge hosted by Laura from I'd Much Rather Bake Than... who has chosen the theme "Spices" The recipe contains quite a bit of cinnamon which is perfect for this time of the year. 


I'm also sending this to the No Waste Food Challenge hosted by Elizabeth from Elizabeth's Kitchen Diary. I used up my leftover chocolate and berry mix. 


An original recipe by bakingaddict

225g butter
220g dark brown sugar
180g wholemeal flour
250g oats
2 teaspoons baking powder
2.5 teaspoons ground cinnamon
2 eggs
150g fruit & nut mix with cinnamon dusted milk chocolate almonds
70g chocolate, chopped
100g berry mix (raisins, sultanas, dried cranberries)


  • Preheat the oven to 180C. Grease and line 2 baking trays.
  • Cream the butter and sugar for a few minutes.
  • Add in egss one at at time a mix well.
  • Mix in flour, baking powder, ground cinnamon and oats.
  • Finally stir in the fruit, nuts, chocolate and berry mix. 
  • Using a small ice cream scoop, place round balls of dough spaced apart on a baking tray.
  • Bake for approximately 10-12 minutes or until golden brown.
  • Allow to cool on the tray for 5 minutes before transferring to a wire rack to cool completely.
  • The cookies will harden as they cool. 


Wednesday, 23 October 2013

Carrot and Walnut Cake


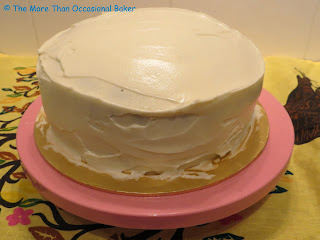
It's birthday month again and as Kim's favourite cake is carrot cake, it was an easy choice. I used my tried and tested carrot cake recipe but added in some walnuts for flavour and texture. I also used them to decorate the sides and edges of the cake. Needless to say, the birthday girl was very happy and I've had a request to make this for someone else who tried it for next year! 

I'm entering this to AlphaBakes which I am hosting this month and co-host with Caroline from Caroline Makes. The letter is C for carrot cake. 


I'm also entering this to the One Ingredient Challenge hosted by Laura from How to Cook Good Food and co-hosted by Nazima from Franglais Kitchen. The ingredient this month is walnuts which influenced my choice of nuts as I usually prefer pecans in carrot cake but I have to say it was very tasty with the walnuts! 


And finally to Made with Love Mondays hosted by Javelin Warrior who asks us to make recipes from scratch. 


For the carrot cake
150ml olive oil
150g muscovado sugar
3 eggs
220g wholemeal flour
1.5 teaspoon baking powder
1 teaspoon bicarbonate of soda
1 teaspoon ground cinnamon
1/2 teaspoon mixed spice
zest of 1 orange
100g raisins
250g carrots, peeled and grated
100g walnuts, toasted and roughly chopped plus extra to decorate (about 80g)

For the orange cream cheese frosting
300g cream cheese
50g butter
150g icing sugar
zest of 1 orange
1-2 tablespoons fresh orange juice (depending on consistency of icing requred)

  • Preheat the oven to 180C. Grease and line 2 x 18cm sandwich tins. 
  • In a large bowl, whisk the olive oil, sugar and eggs until the sugar has dissolved and the eggs are slightly fluffy. 
  • In a separate bowl, sift the flour, baking powder, bicabonate of soda and spices and add to the egg mixture.
  • Add in the remaining ingredients and mix well. 
  • Divide the mixture evenly between 2 tins (I usually weigh them to get even sized cakes)
  • Bake for approximately 25-30 minutes or until the cake springs back from the edge and a skewer inserted into the centre comes out clean. 
  • Allow to cool in the tins for 10 minutes before turning out to a wire rack to cool completely. 
  • Meanwhile make the frosting by beating all the ingredients in an electric mixer until smooth.
  • Sandwich the cakes with frosting and spread a thick layer on top of the cake.
  • Decorate with toasted, chopped walnuts on the outside and edge of cake. 

Tuesday, 13 August 2013

Carrot Cake Cupcakes and a review


I've been getting repeated requests for carrot cake at work so I decided to bake some but in a cupcake form instead of a layer cake. I wanted to give some away as a gift and it's much easier to present cupcakes as a gift than slices of cake. I used the recipe that I made up previously with a few minor changes. The first is a tip from my mum which was to soak the raisins in fresh orange juice overnight. The raisins were really plump and juicy and tasted great! I also added in a banana as I had one brown banana on the counter begging to be used and I think it adds to the moistness of the cake. I also omitted the nuts as one of my colleagues is allergic to walnuts. Overall, the cake got great reviews - it was moist, juicy and not too sweet. The cream cheese frosting was the perfect complement and the little carrot chocolate decorations were literally the icing on the cake. 

The cupcakes looked great after baking and decorating and were screaming to be presented in a lovely cake stand. I decided it was the perfect opportunity to use my new cake stand from dotcomgiftshop and to tell you a little about it. It's the Petit Four Botanical Cake Stand made of ceramic with a scalloped edging and glass top. It fits 3 cupcakes perfectly and will fit a small layer cake. It would also be good to display whoopie pies, cookies or mini cakes. The cake stand is surprisingly light but sturdy. The flowers on the glass stand are beautiful and I've taken pictures from different angles to give you an idea of what it looks like in 3D. 

My verdict - It's a great little cake stand to display your baked goods. It's light and easy to wash and keeps your baked goods fresh. It is petit as the name suggests so don't expect to fit a large layer cake in there! A perfect gift for the baker in your family or a treat for yourself. 


 wholemeal flour, olive oil, muscovado sugar, ground cinnamon, ground mixed spice, orange, cream cheese, carrots, raisins soaked in fresh orange juice 


 adding in the ingredients to the flour mixture 

 ready to go in the oven 

 fresh from the oven 

 rows of pretty carrot cake cupcakes 

 cake stand 

 different view of the glass cover 

 yet another view of the glass cover 

 fits 3 cupcakes perfectly 

  view from the side 

 view from the top 

For the carrot cake
150ml olive oil
150g muscovado sugar
3 eggs
240g wholemeal flour
1.5 teaspoon baking powder
1 teaspoon bicarbonate of soda
1 teaspoon ground cinnamon
1/2 teaspoon mixed spice
zest of 1 orange
100g raisins soaked in fresh orange juice overnight and then drained
300g carrots, peeled and grated
1 ripe banana (optional)

For the orange cream cheese frosting
300g cream cheese
150g icing sugar
zest of 1 orange
1-2 tablespoons fresh orange juice (depending on consistency of icing requred)

  • Preheat the oven to 180C. 
  • In a large bowl, whisk the olive oil, sugar and eggs until the sugar has dissolved and the eggs are slightly fluffy. 
  • In a separate bowl, sift the flour, baking powder, bicabonate of soda and spices and add to the egg mixture.
  • Add in the remaining ingredients and mix well. 
  • Spoon the mixture into cupcake cases and bake for approximately 10-12 minutes or until a skewer inserted into the centre comes out clean. 
  • Allow to cool in the tins for 5 minutes before turning out to a wire rack to cool completely. 
  • Meanwhile make the frosting by beating all the ingredients in an electric mixer until smooth.
  • Spread the frosting on top of the cupcake using a palette knife and finish with a chocolate carrot decoration or as desired. 
Disclaimer: I was sent the cake stand for review purposes free of charge. I was not required to write a positive review. All opinions expressed are my own.