Showing posts with label maple syrup. Show all posts

Saturday, 25 April 2015

Blueberry Pancakes with maple syrup


Happy weekend everyone! I love weekends for many reasons and I'm sure most of you will agree that generally it represents time to relax and unwind and if you're lucky to have a lie in. Most of all it's about the food. When we have a free weekend at home, we like to cook our own brunch and our favourites are waffles, pancakes or poached eggs on muffins. Easter seems like such a long time ago now but I still remember these pancakes which we had on Easter Monday. J wanted blueberry pancakes so I found a recipe online from Sally's Baking Addiction and it turned out beautifully. It was light, fluffy and full of blueberries. I served it with more fresh blueberries, fresh strawberries and lashings of maple syrup.  It made for a really filling brunch and I'm pretty sure there's at least one of my five a day in there! 


 wet ingredients, dry ingredients and fresh blueberries 

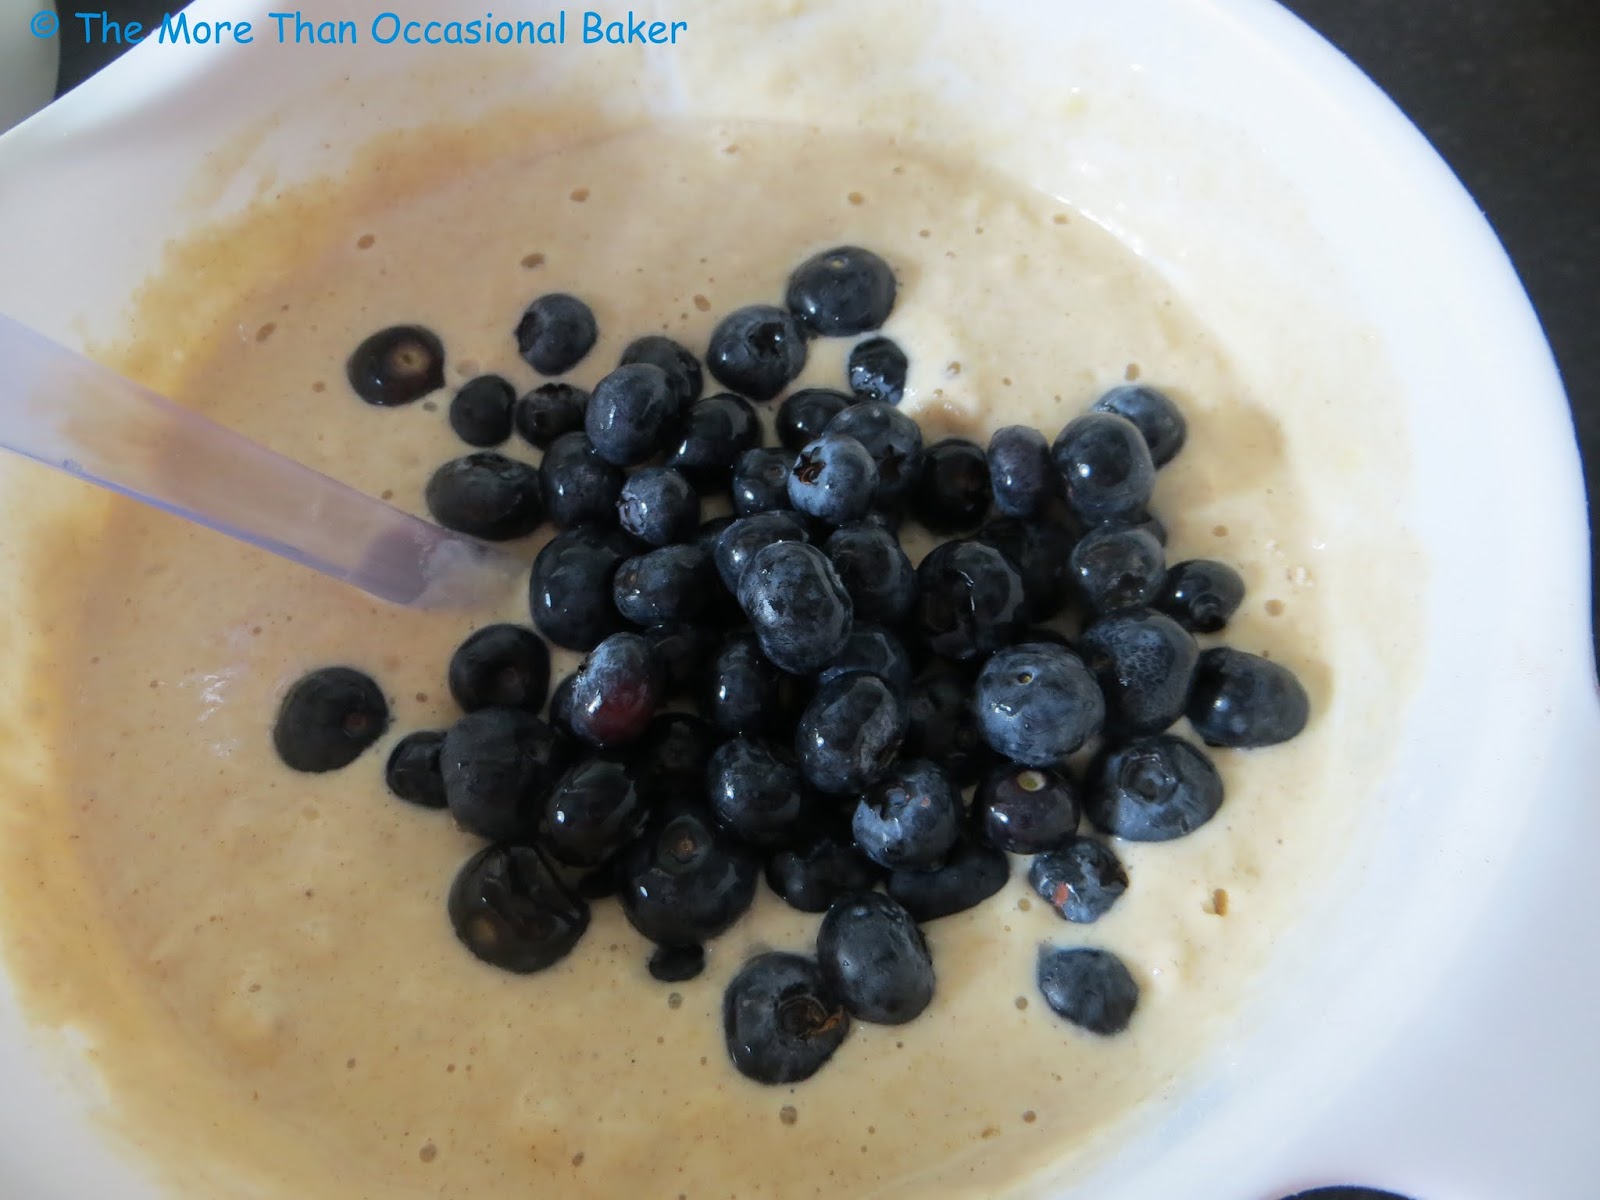
 adding the fresh blueberries 

 serve with maple syrup 

Recipe adapted slightly from Sally's Baking Addiction

250g plain flour
2 teaspoons baking powder
1/2 teaspoon bicarbonate of soda
1 teaspoon ground cinnamon
250g low fat natural yoghurt
300ml milk
60ml Clarks Carob fruit syrup
2 eggs
45g melted butter
300g fresh blueberries


  • In a large bowl, mix all the dry ingredients - plain flour, baking powder, bicarbonate of soda, ground cinnamon. 
  • In a separate bowl, whisk the eggs, milk, carob fruit syrup, yoghurt and melted butter. 
  • Pour the wet ingredients into the dry ingredients and mix gently until it forms a smooth batter. 
  • Finally stir in the blueberries. 
  • Heat a frying pan with cooking spray or oil or butter. 
  • Add a ladleful of batter to the hot pan and cook until the edges look dry and there are bubbles in the mixture.
  • Flip the pancake in one go and cook until it is browned on both sides. 
  • Keep the pancakes warm in a pre-heated oven about 150C until all the pancakes are cooked.
  • Serve with fresh berries and maple syrup. 


Monday, 9 February 2015

Banana, walnut and chocolate chip cake with maple syrup cream cheese frosting


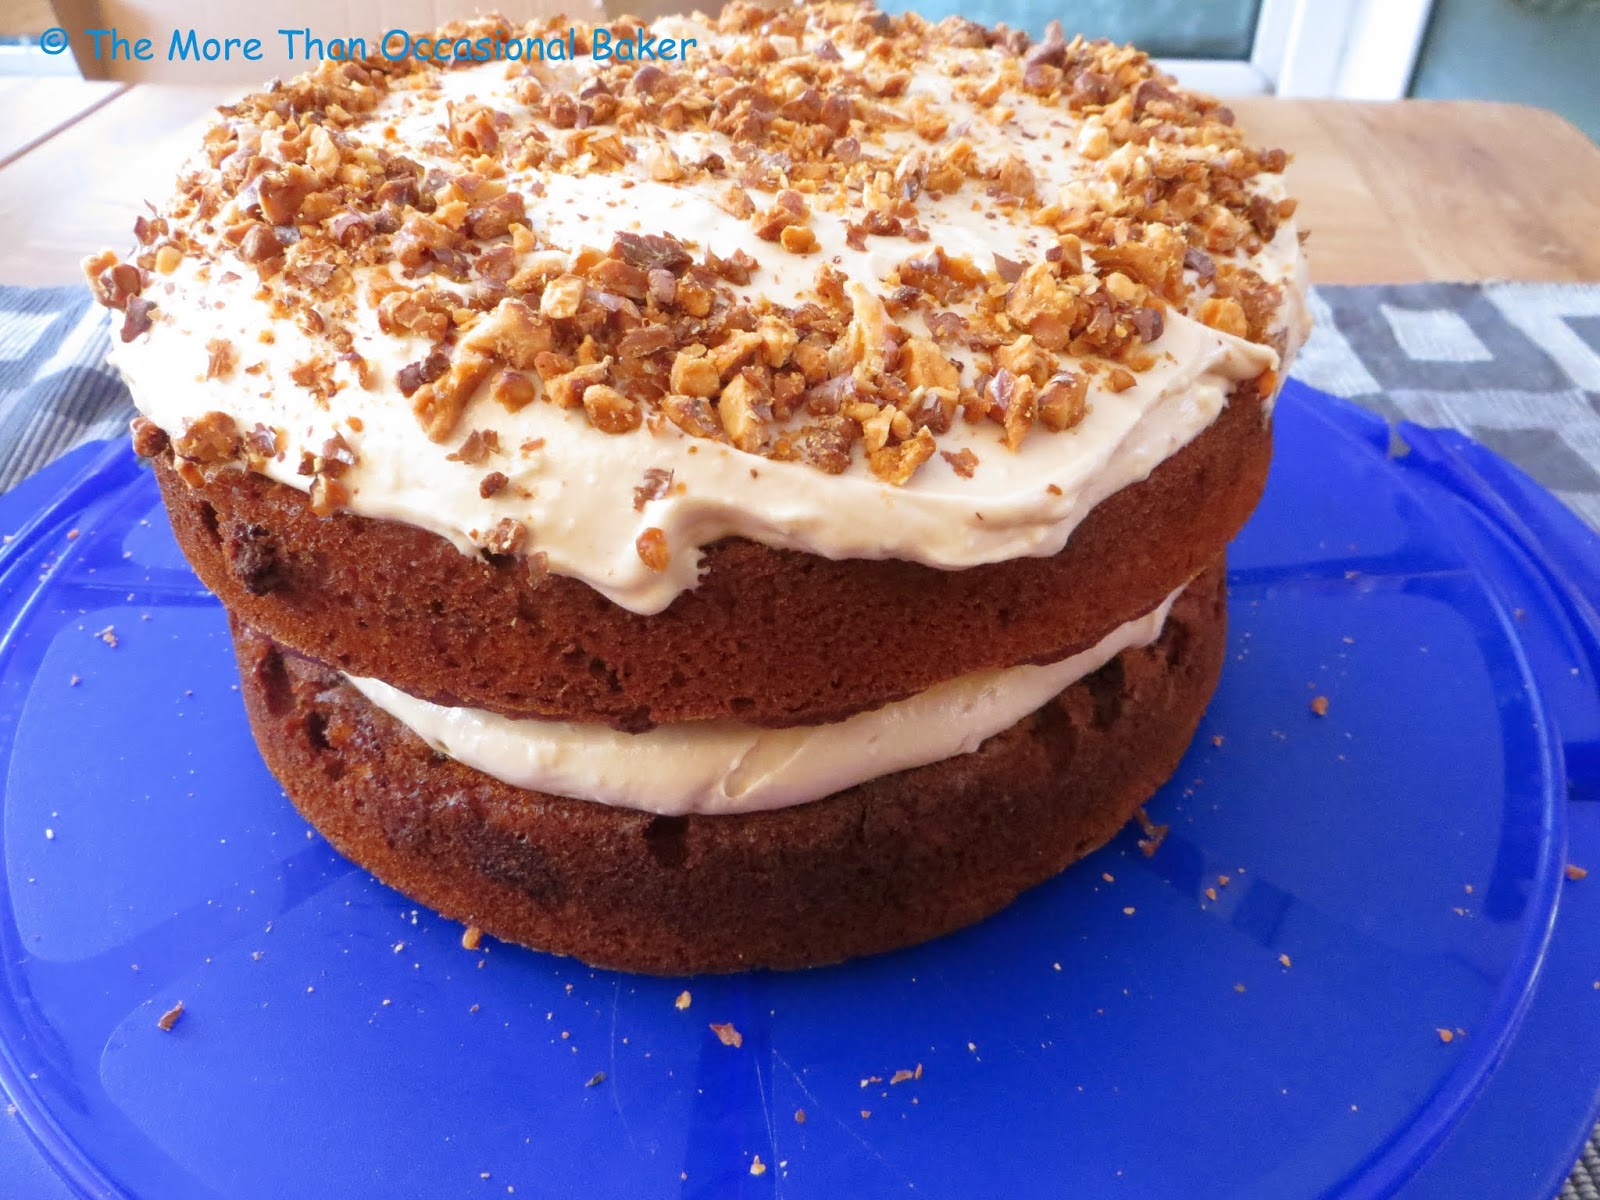
This is honestly the best cake I've eaten in a while and that's saying a lot! It came about by chance as I couldn't decide what to bake but I knew I wanted to bake with bananas. I didnt want to bake another banana muffin so I thought a cake would be better. I had a discussion with one of my work colleagues who loves cake as much as I do and we 'created' this cake together by discussing what ingredients she wanted in the cake!! I said I wanted to use bananas and she wanted chocolate, walnuts, honey and maple syrup. I thought about it and decided that I could make it work so I gave it a go! The results were truly amazing. I incorporated everything she wanted in the cake and added a cream cheese frosting as well. The cake was really moist and full of banana flavour. You can taste the walnuts and the chocolate chips in there which also added a depth of texture to the cake. Unfortunately you can't really taste the honey but you can clearly taste the maple syrup cream cheese frosting. 

The following week, my colleague who helped me create the cake told me what happened when she took a slice home for her house mate. She described the cake to her housemate who did not look impressed particularly as she does not like bananas. However, she decided to have a taste and after a few bites said "if I'd known it was going to be so good, I'd have taken it to bed with me!!" That's honestly how I feel about this cake as well and I'm definitely going to have to bake it again. 

I'm sending it to a few blog challenges this month...  

Love Cake hosted by Ness from Jibber JabberUK. This month is the anniversary of the challenge and the theme is For The Love of Cake. This is not a typical Valentine bake but it came about through our love of cake and it's definitely one of my favourite cakes ever. 


No Waste Food Challenge hosted by Elizabeth from Elizabeth's Kitchen Diary. This recipe uses up old bananas and ingredients from my cupboard. 


Cook Blog Share hosted by Lucy from Supergolden Bakes


Recipe of the Week hosted by Emily from A Mummy Too


 dry ingredients and wet ingredients 

 adding in chocolate chips and walnuts

 ready to go in the oven 

 I love how you can still see the chocolate chips and you can definitely taste them! 

 with the maple syrup cream cheese frosting 

 decorated with chopped, toasted walnuts 


An original recipe by bakingaddict

For the cake 
250g plain flour
100g brown sugar
1 tablespoon baking powder
1 teaspoon bicarbonate of soda
3 or 4 ripe bananas
250mls milk
80mls vegetable oil
2 eggs
100g chocolate chips
150g walnuts ( I left them whole for extra crunch but you can chop them up but not too finely!)
60ml honey

For the frosting
100g butter
100g light muscovado sugar
85mls maple syrup
220g cream cheese

To decorate
20-25g toasted walnuts, roughly chopped


  • Preheat oven to 180C.
  • Grease and line 2 x 18cm round baking tins.
  • Sift the flour, sugar, baking powder and bicarbonate of soda in a medium sized bowl and set aside.
  • In a large bowl, roughly mash the bananas with a fork. 
  • Add in the milk, vegetable oil, honey and milk and mix well.
  • Add the dry ingredients to the wet ingredients and mix.
  • Finally stir in the chocolate chips and walnuts.
  • Divide the batter evenly into the cake tins and bake for approximately 35-40 minutes or until golden brown and a skewer inserted into the centre comes out clean.
  • Place the remaining walnuts for the topping in the hot oven and roast for about 5-7 minutes making sure that they don't burn. 
  • Allow the cakes to cool completely before decorating. 
  • To make the frosting, beat the butter and sugar until smooth.
  • Add in the cream cheese and maple syrup and continue beating until very smooth.
  • Place a generous layer of frosting on top of the first layer of cake. Place the second layer on top and spread the remaining frosting on top of the cake.
  • Sprinkle with the toasted, roughly chopped walnuts.


Tuesday, 18 November 2014

Parsnip Cake and a review


I watched a demonstration by Mich Turner at a cake show years ago and was really impressed. Jacqui Small offered me a review copy of Mich Turner's Cake School and I can tell you now that I will be referring to this book frequently from now on. First impressions are that it's a substantial book. It's a large hardback with 272 pages including index. It has stunning colour photography by Amanda Heywood. I love a recipe with photos and this definitely delivers on that count.


Mich's introduction explains that this book is more than just about recipes, it's to help you understand the stages of baking, what is important, what to do, what not to do and offers lots of practical hints and tips. It has a nice large, easy to read font accompanied by pictorials.


The chapters are divided into

  • Lesson 1 : Making & Baking Cakes - ingredients, preparation, cake-baking methods
  • Lesson 2: Putting it All Together - fillings & frostings, covering & assembly
  • Lesson 3 : Decorating - hand piping, hand moulding, hand painting
  • Cake Templates
  • Tools
  • Index
Below is an example page of her monochrome lace tutorial with pictorial step by step guide and hand tips from Mich. 


She also has a tutorial on hand-moulding teddy bears. The bear looks really realistic!


There are a few recipes in the book for cakes, brownies and muffins. I chose to make her parsnip cake as I've tried it once before and it was delicious.  As Mich says, the cake is wonderfully moist, sweet and succelent. She's added in apples, walnuts and maple syrup all of which work well with the parsnips. Everyone was really impressed with the cake and could not tell that there were parsnips in the cake.

My verdict - This is really good book to have on your shelf whether you are a beginner or an advanced baker. It's full of practical tips and the book is beautifully laid out with plenty of colour photographs illustrating methods and recipes. It's very easy to read and the instructions are clear and simple. I would have happily bought this book for myself and will definitely make a great gift either for yourself or for someone else.

If you are interested in a copy, Jacqui Small are offering a discount to my readers.
To order Mich Turner's Cake School at the discounted price of £24.00 including p&p* (RRP: £30.00), telephone 01903 828503 or email mailorders@lbsltd.co.uk and quote the offer code APG212.
*UK ONLY - Please add £2.50 if ordering from overseas.


 melt butter, sugar and maple syrup

 grated parsnip, apple and orange zest

 adding the grated parsnip, apple and orange zest

 adding in the walnuts

 Place one cake on a serving tray then smooth frosting on top 

 place the second cake on top and cover with the remaining frosting

 drizzle with maple syrup before serving 


 who wants a slice? 

Recipe extracted from Mich Turner's Cake School by Mich Turner, published by Jacqui Small www.jacquismallpub.com - reproduced with permission

Makes a 20cm (8inch) round cake
For the cake
175g unsalted butter
250g demerara sugar
100ml maple syrup
3 large eggs
250g self-raising flour
2 teaspoons baking powder
2 teaspoons mixed spie
150g parsnips, peeled and grated
1 medium apple, peeled and grated 
grated zest of 1 small orange, plus 2 tablespoons juie
50g walnuts, roughly chopped

For the mascarpone and maple syrup frosting
250g mascarpone
3 tablespoons maple syrup, plus extra to drizzle

  • Preheat the oven to 180C/350F/Gas Mark 4.
  • Grease and line two 20cm (8inch) sandwich tins with non-stick baking parchment. 
  • Melt the butter, sugar and maple syrup together in a saucepan over a gentle heat until dissolved and smooth. 
  • Remove from the heat and leave to cool slightly.
  • Whick the eggs into the mixture.
  • In a separate bowl, sift together the flour, baking powder and mixed spice.
  • Stir this into the cake batter until smooth. 
  • Add the grated parsnips, apple, orange zest and juice and the walnuts and stir until well combined,
  • Divide the cake mixture between the prepared tins and bake for 25-30 minutes or until the cake is golden brown and the tops spring back when pressed lightly. 
  • Transfer the tins to a wire rack to cool for 5 minutes in the tins before turning out and leaving to cool completely.
  • To make the frosting; just before serving, stir the maple syrup into the mascarpone.
  • Place one cake on a serving plate.
  • Spread half the mascarpone frosting over the base cake and place the other cake on top.
  • Spread the remaining frosting on top of the cake and drizzle with maple syrup as the cake is served.
  • Storage: Keeps for 3 days in an airtight container - preferably in the fridge.
  • Variation: Substitute half the parsnip with grated carrot. 
Disclaimer: I was sent a copy of Mich Turner's Cake School for review purposes. A positive review was not required and all opinions expressed are my own. This is not a sponsored post. 

Tuesday, 28 October 2014

Pumpkin Pecan Roll with Maple Cinnamon Glaze


This is one of  my rare forays into bread baking. Possibly inspired by the Great British Bake off but mainly inspired by a jar of Pecan Pumpkin Butter I bought from America. I debated about what recipe to use it in and came up with pumpkin pie, pumpkin cookies or pumpkin cake but in the end I decided to make a version of cinnamon rolls using pumpkin, pecan and maple syrup. I have to admit that I threw the first lot of dough away as I was not happy with it and it just wouldn't come together. I made it the second time with the same ingredients and it worked beautifully. It definitely takes a little time to make your own dough but it's absolutely, totally worth it. The bread was so soft and light it felt like cotton wool on the inside. The pumpkin pecan filling was absolutely delicious and you can clearly taste the pumpkin with a hint of apple and spice. The maple cinnamon glaze complemented the flavours and my kitchen smelt heavenly whilst baking this. This is my first time trying the Clarks Pure Canadian No1 Light Maple Syrup. It comes in a lovely glass flask and tastes better than the regular maple syrup. The taste is purer and it smells divine! 

These rolls are perfect for a weekend breakfast or even at a Halloween party as it has very autumnal flavours. You can easily add some Halloween sprinkles or make an orange glaze (with orange colouring) for a more Halloween feel.  This success has now inspired me to try making more of my own bread so look out for more bread recipes in the future. 

I'm entering this to Treat Petite hosted by Kat from the Baking Explorer and Stuart from Cakeyboi. The theme this month is Trick or Treat. The deadline has past but Kat has kindly agreed to include this in the round up - thank you. 


I am also entering it to Let's Cook for Halloween hosted by Nayna from Simply Food.


 my lovely jar of pecan pumpkin butter

 I used my new (ish) Lekue bread maker which I bought from Lakeland - it's silicone and you can weigh and mix the ingredients in there and knead the dough...

 ... then close it up and leave it to prove! 

 it more than doubled in size yay! 

 roll out the dough

 add chopped, roasted pecans to the pecan pumpkin butter


 spread mixture evenly all over the dough

 roll up the dough like a swiss roll and slice 

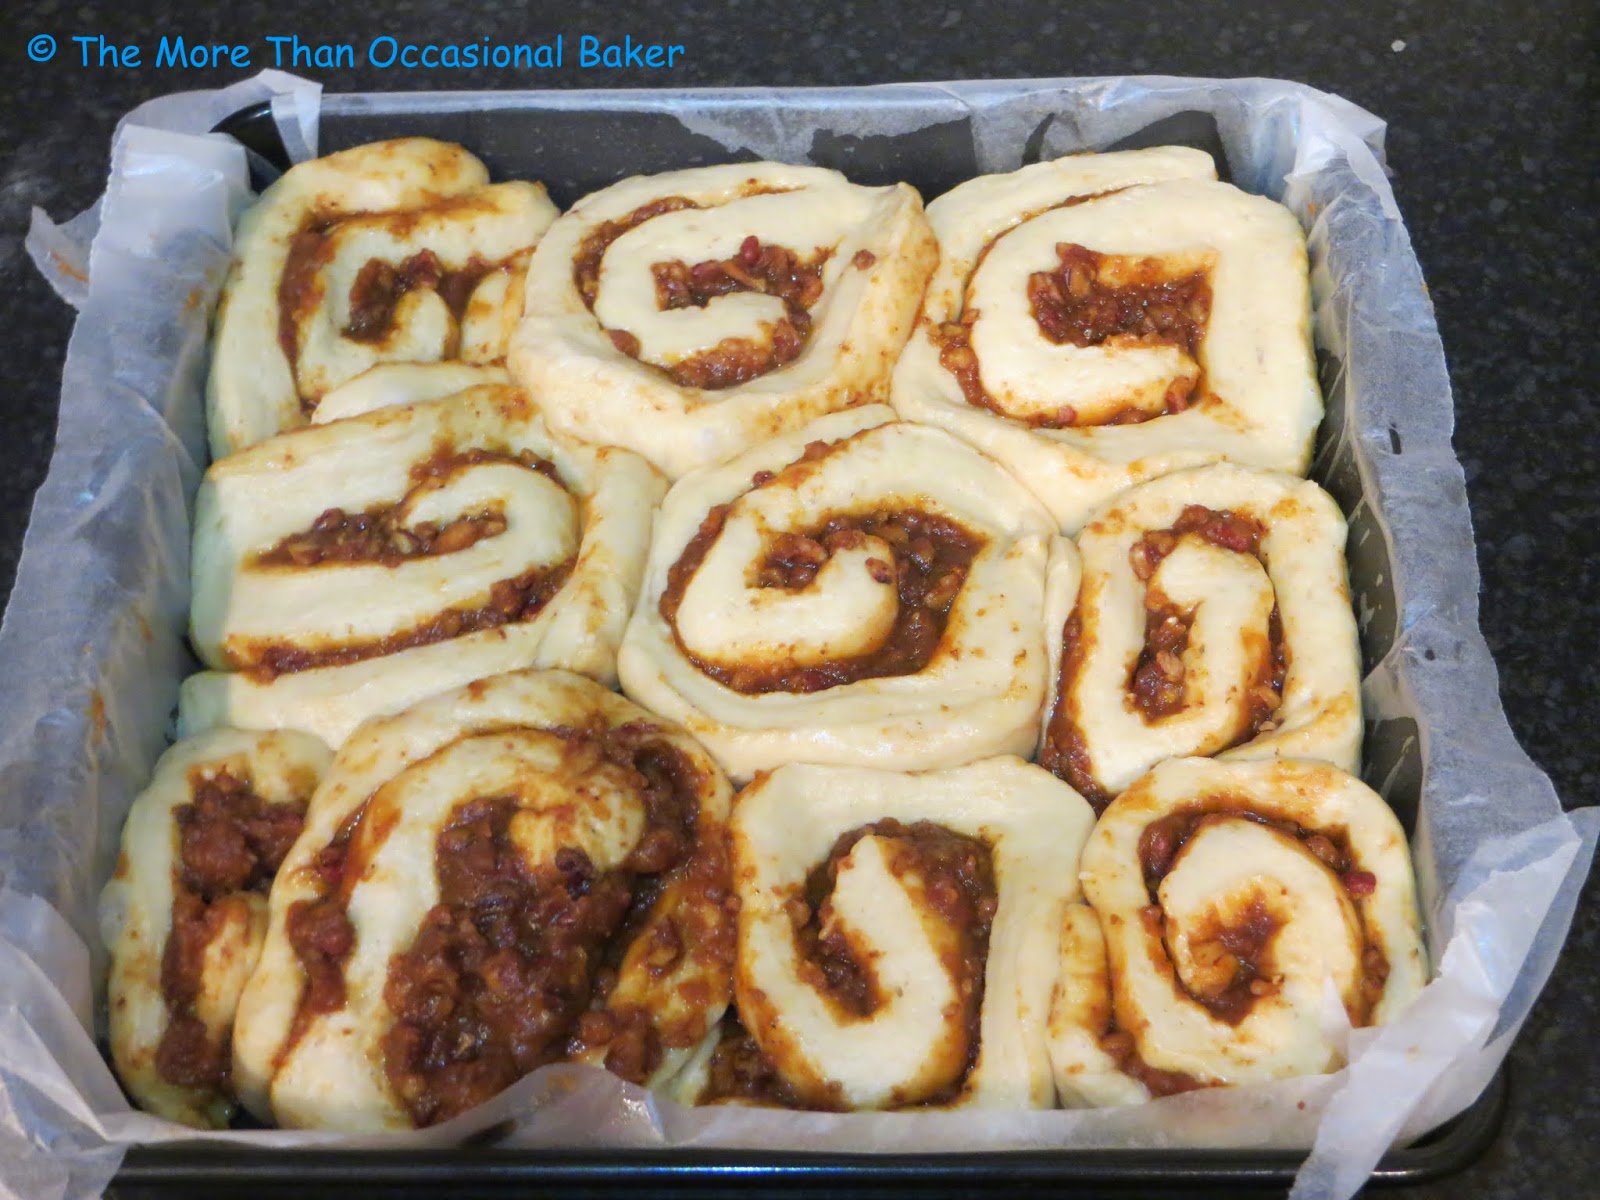
 arrange in a tin leaving a small gap between each roll. Cover with a damp tea towel and leave it for another 30 minutes or so 

 
 you can see that the dough has expanded further to fill all the gaps. Brush with a beaten egg before baking

 drizzle maple cinnamon glaze on top 


  yum! 

 The bread is really soft and delicious and the filling is very tasty! 

Bread recipe from BBC Food

For the dough
500g strong white bread flour
1 teaspoon salt
50g brown sugar
1.5 teaspoon dried yeast
75g butter
200ml milk
1 egg

For the filling
1 jar of pecan pumpkin butter
100g pecans - lightly roasted and roughly chopped

1 beaten egg to brush on top of the the dough before baking

For the maple cinnamon glaze
60mls maple syrup
1-2 teaspoons ground cinnamon (adjust to taste) 
250g icing sugar
few tablespoons of milk (optional) 

  • Start by making the dough - place the flour, salt and sugar in a bowl and mix. Add in the yeast and then rub the butter into the flour mixture until it resembles breadcrumbs. 
  • Make a well in the centre and pour in the milk and crack in the egg.
  • Mix together with your hands - don't worry if it's sticky, be patient and it will come together.
  • Turn the dough out onto a clean surface ( I used a silicone mat) and knead the dough until it is smooth and elastic. This can take up to 10 minutes! 
  • To test if it's ready, take a small piece of dough and stretch it as then as possible - you should be able to see the light through it and it should not break easily.
  • Place the dough in a lightly oiled bowl or in a silicone bread maker if you have one. Cover and leave to prove for about 90 minutes. 
  • Prepare the filling by lightly roasting the nuts and then roughly chopping them.
  • Scoop out the pecan pumpkin butter and add the prepared nuts. 
  • When the dough is ready, punch it a few times with your knuckles to knock the air out 
  • Roll the dough out to a rectangle as shown.
  • Spread the filling evenly making sure to go right to the edge.
  • Starting with the long side, roll the dough up into a sausage shape as you would a swiss roll.
  • Cut into 12 equal slices.
  • Place the slices with the spiral facing up in a lined square tin.
  • Cover with a damp tea towel and leave to prove for a further 45-60 minutes.
  • Preheat the oven to 200C.
  • The buns should have expanded and will feel springy to the touch.
  • Beat an egg in a bowl and brush the tops of the buns.
  • Bake at 200C for 10 minutes and then lower the temperature to 180C and bake for a further 15-20 minutes. 
  • Make the maple cinnamon glaze by mixing the icing sugar with the ground cinnamon. Pour in the maple syrup and mix until smooth. 
  • Add a few drops of milk if required. 
  • Once the buns are ready, remove from the oven and drizzle the glaze on top.
  • Best served warm but it kept well for a few days in an airtight container. 
Disclaimer: I was sent some Clarks maple syrup for review purposes including this Clarks Pure Canadian No1 Light Maple Syrup. This is not a sponsored post and all opinions expressed are my own.