Tuesday, 28 April 2015

Chocolate Aubergine Cake


Yes you read the title correctly. The main ingredient in this cake is aubergine! I've baked with vegetables before mostly carrot, courgette, parsnip and beetroot but I've never tried using aubergine. I got the recipe from Red Velvet Chocolate Heartache which is a lovely book by Harry Eastwood. She writes beautifully and the recipes are naturally gluten free. She uses vegetables and a combination of ground almonds and/or rice flour which makes the cakes healthier. This replaces the usual butter and sugar that goes in cakes. I really liked the title of this cake which is Chocolate heartache. I decided I had to bake it as it's named in the title of the book. Plus I was looking for a gluten free cake that contained chocolate for a celebration. The cake was really dense and chocolatey and you definitely can't taste the aubergine in the cake. Everyone could not believe that the cake was gluten free and contained vegetables! The cake was so good I baked it twice in the same week. The first time I made a simple chocolate icing to go on top but felt it was a little too rich to go with the already rich cake. The second time I covered the cake with fat free greek yoghurt and that worked really well as it helped to cut through the denseness of the cake. 

I'm sending this to a few blog challenges this month. Tea Time Treats hosted by Karen from Lavender and Lovage and Jane from The Hedgecombers. The theme this month is chocolate. 

Extra Veg hosted this month by Jo from Jo's Kitchen on behalf of Helen from Fuss Free Flavours and Michelle from Utterly Scrummy Food For Families. This cake is definitely a sneaky way to get extra veg into your diet!


Recipe of the week hosted by Emily from A Mummy Too.


Cook Blog Share hosted by Lucy from Supergolden Bakes.


Tasty Tuesdays guest hosted by Mel from Le Coin De Mel on behalf of  Vicki from Honest Mum.


Bake of the week hosted by Helen from Casa Costello


 baking powder, cocoa powder, ground almonds, honey, dark chocolate, eggs and aubergine. 

 cook the aubergine in the microwave then peel off the skin and puree the aubergine in a food processor. Add dark chocolate and allow to melt or  blitz gently until mixed. 

 adding the chocolate aubergine paste to the remaining ingredients

 ready to bake 

 a lovely chocolatey fudgy cake 

 with chocolate icing 


 with fat free greek yoghurt 


Recipe is from Red Velvet Chocolate Heartache by Harry Eastwood. If you click on the amazon link, you can 'look inside' the book. The recipe is available to view online. If I get permission from the publisher then I will publish the recipe here.

Saturday, 25 April 2015

Blueberry Pancakes with maple syrup


Happy weekend everyone! I love weekends for many reasons and I'm sure most of you will agree that generally it represents time to relax and unwind and if you're lucky to have a lie in. Most of all it's about the food. When we have a free weekend at home, we like to cook our own brunch and our favourites are waffles, pancakes or poached eggs on muffins. Easter seems like such a long time ago now but I still remember these pancakes which we had on Easter Monday. J wanted blueberry pancakes so I found a recipe online from Sally's Baking Addiction and it turned out beautifully. It was light, fluffy and full of blueberries. I served it with more fresh blueberries, fresh strawberries and lashings of maple syrup.  It made for a really filling brunch and I'm pretty sure there's at least one of my five a day in there! 


 wet ingredients, dry ingredients and fresh blueberries 

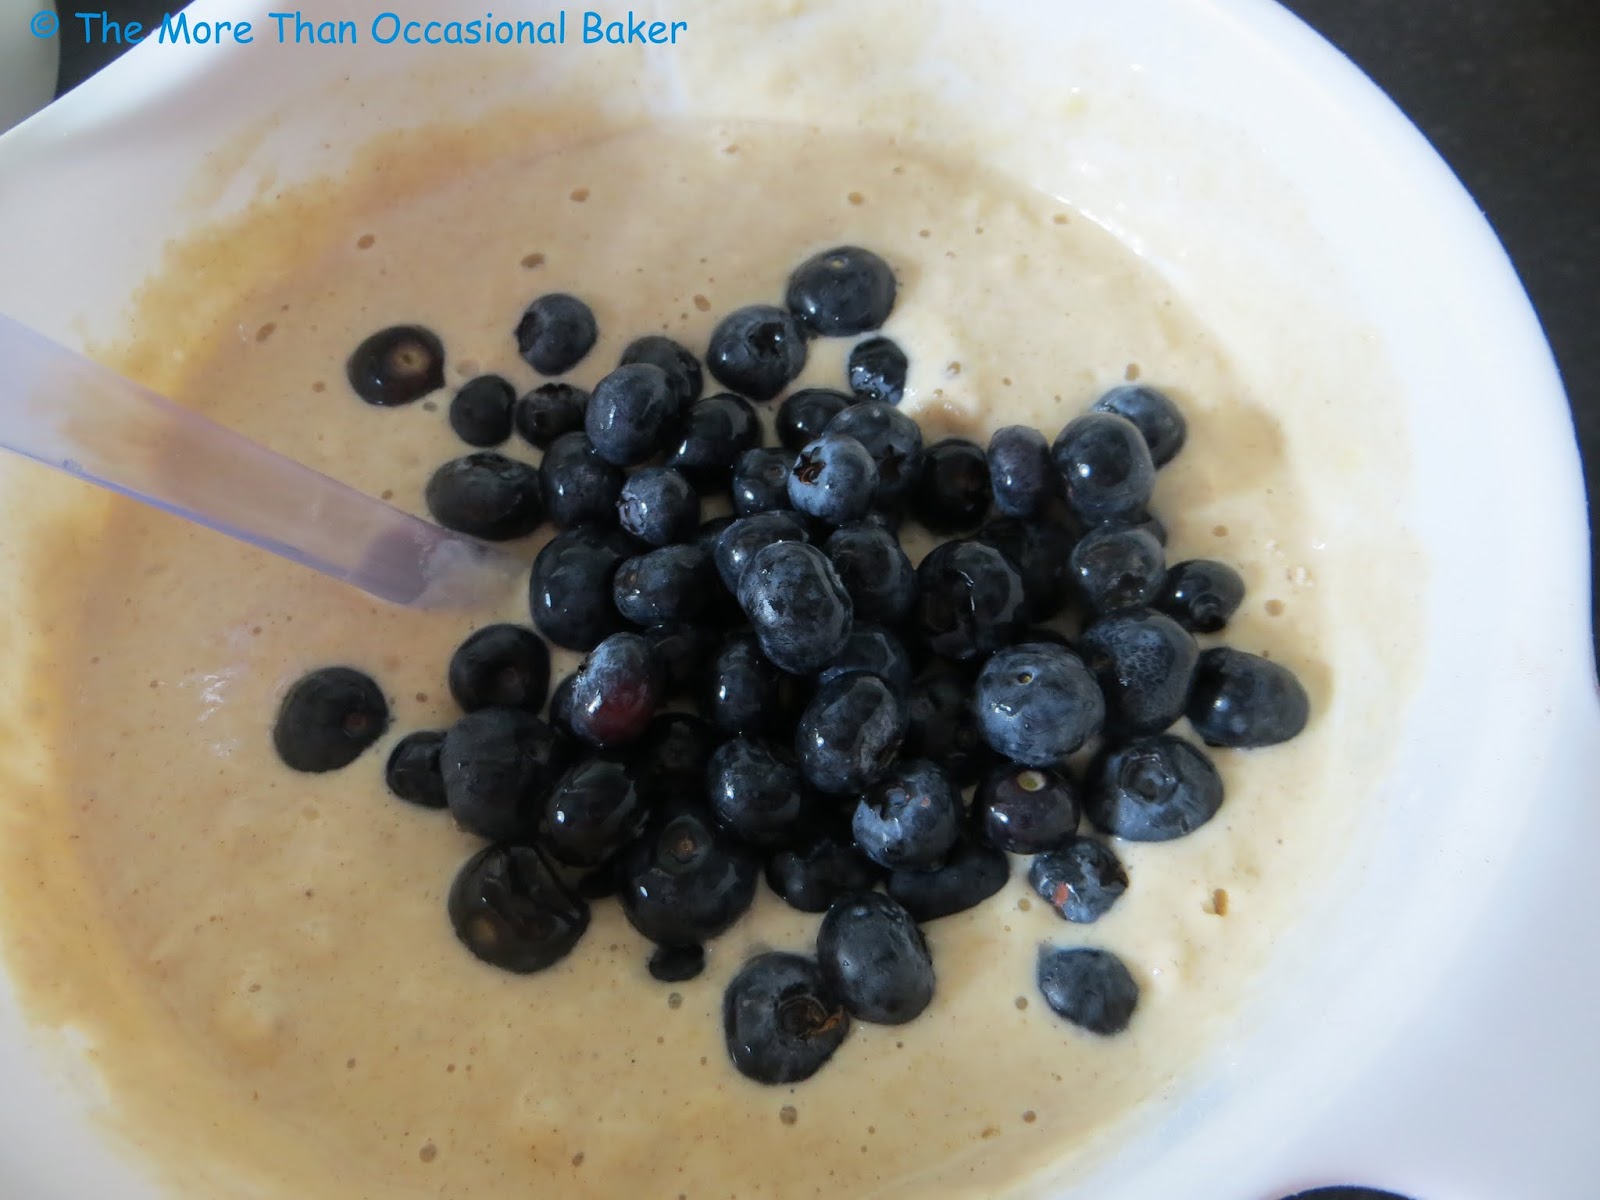
 adding the fresh blueberries 

 serve with maple syrup 

Recipe adapted slightly from Sally's Baking Addiction

250g plain flour
2 teaspoons baking powder
1/2 teaspoon bicarbonate of soda
1 teaspoon ground cinnamon
250g low fat natural yoghurt
300ml milk
60ml Clarks Carob fruit syrup
2 eggs
45g melted butter
300g fresh blueberries


  • In a large bowl, mix all the dry ingredients - plain flour, baking powder, bicarbonate of soda, ground cinnamon. 
  • In a separate bowl, whisk the eggs, milk, carob fruit syrup, yoghurt and melted butter. 
  • Pour the wet ingredients into the dry ingredients and mix gently until it forms a smooth batter. 
  • Finally stir in the blueberries. 
  • Heat a frying pan with cooking spray or oil or butter. 
  • Add a ladleful of batter to the hot pan and cook until the edges look dry and there are bubbles in the mixture.
  • Flip the pancake in one go and cook until it is browned on both sides. 
  • Keep the pancakes warm in a pre-heated oven about 150C until all the pancakes are cooked.
  • Serve with fresh berries and maple syrup. 


Wednesday, 22 April 2015

Banana, cashew butter and chocolate chip muffins


Muffins are probably one of our favourite breakfasts to eat on the go. They are so easy to put together and they freeze well so you can jut defrost one overnight for your breakfast in the morning. As usual I had a few over ripe bananas so I decided to make some banana muffins. Recently I was contacted by My Protein who are the largest online sports supplement store in Europe. As you can imagine they sell a lot of high protein products and have a very large selection of them. Initially I wondered how I would incorporate it into baking and I was pleasantly surprised as they sell a lot of nut butters, organic flours, coconut oil, dried fruit, oats and more. I decided to try out kamut flour and cashew butter and knew they would work well in a muffin recipe. 

I've never heard of Kamut flour before so I'll just explain a little in case you haven't either. It's a wheat flour made from the ancient durum wheat relative. It's high in selenium, zinc, magnesium and protein and low in saturated fat. It has a slightly nutty flavour and a very faint smell of nut/protein. The cashew butter was absolutely delicious. It had the lovely aroma of cashew nuts and you can clearly see the nuts in the butter. 

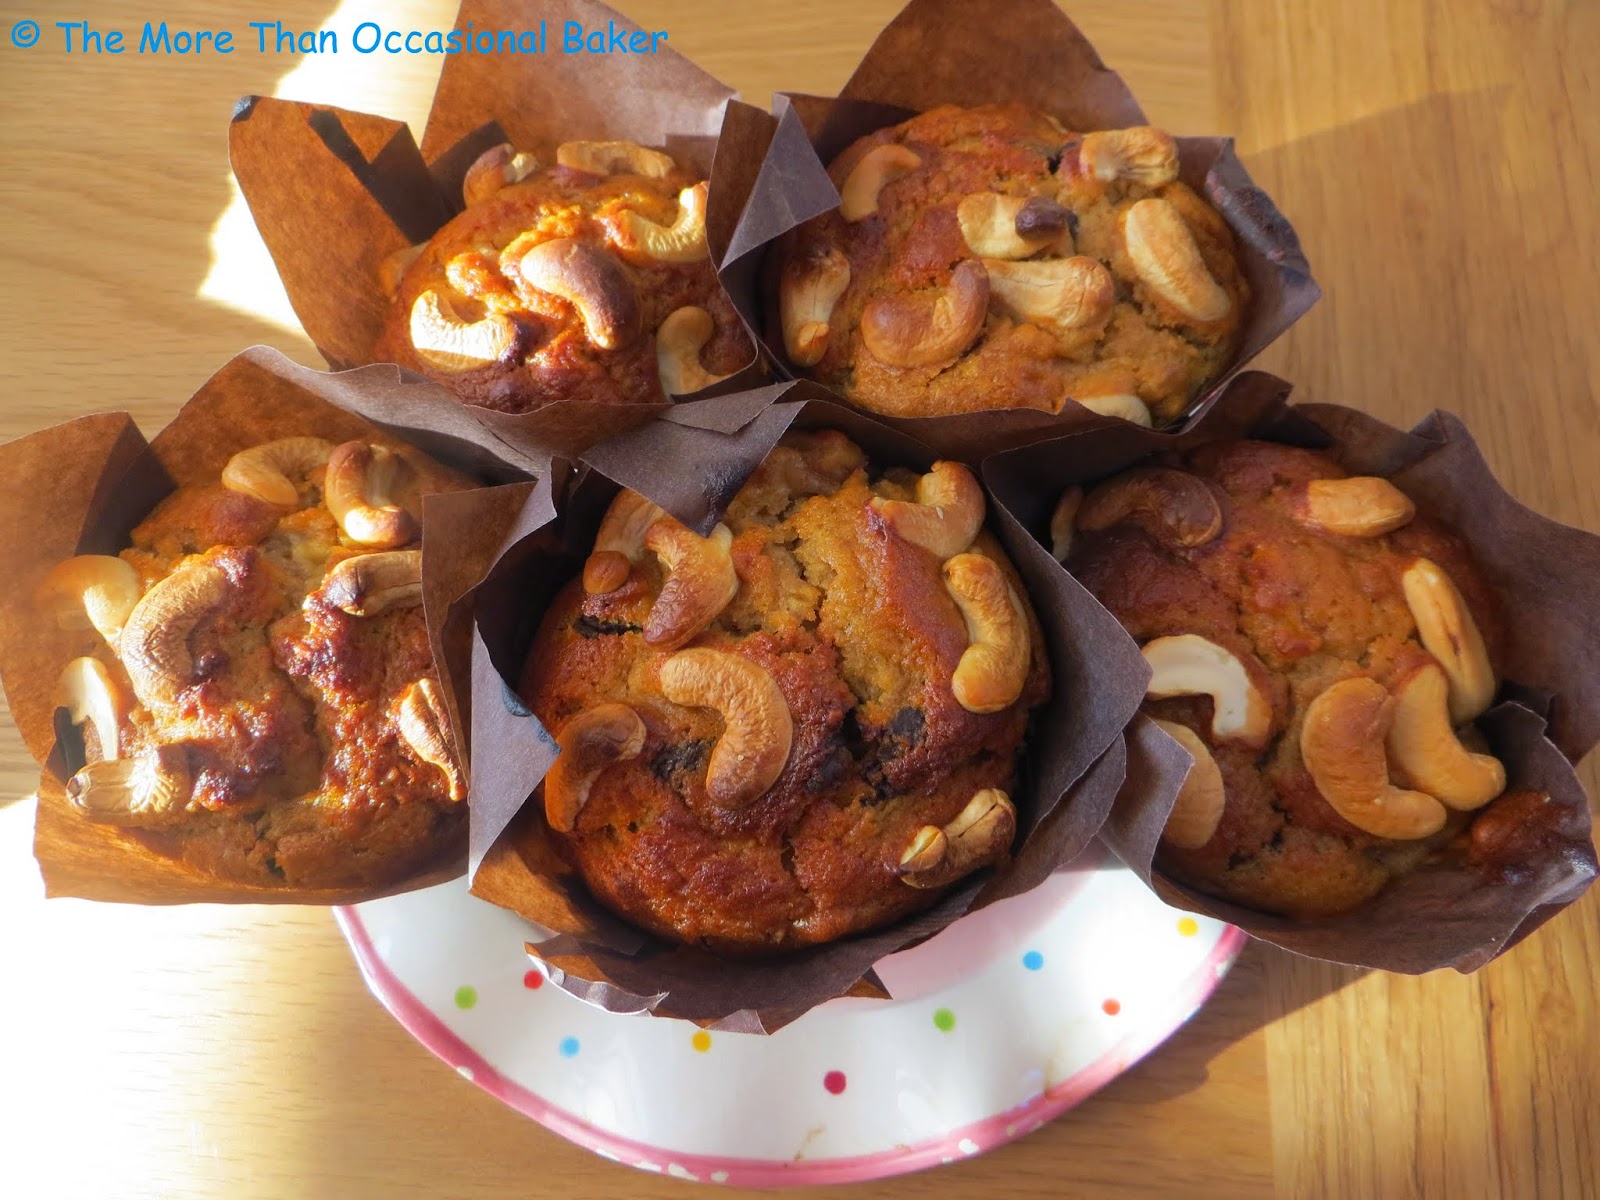
The muffins are made of banana, cashew butter, chocolate chips and kamut flour. I added a sprinkling of raw cashew nuts on top as I had some leftover from another recipe. It adds extra crunch and flavour to the muffins. The muffins were really filling and you can clearly taste the banana and cashew butter. The chocolate chips added a little hint of naughtiness rounded up the flavours nicely. I think some fresh fruit such as blueberries and maybe a little yoghurt will lighten the muffin and make it better. Looks like there's more experimenting to be had in the kitchen! 

I'm sending these to AlphaBakes hosted by Caroline from Caroline Makes and myself on alternate months. The letter ths month is B for banana.


 cashew butter and kamut flour 


 you can clearly see the nuts in the cashew butter 

 dry ingredients + wet ingredients and chocolate chips 

 adding chocolate chips 

 I added a sprinkling of raw cashew nuts on top for extra crunch and flavour 


Makes 12 muffins
250g kamut flour
100g brown sugar
1 tablespoon baking powder
3 ripe bananas, mashed
250mls milk
200g cashew butter
3 tablespoons vegetable oil
2 eggs
60g honey
100g dark chocolate chips.


  • Preheat the oven to 180C.
  • In a medium sized bowl, mix together the flour, brown sugar and baking powder and set aside.
  • In a large bowl, mix the mashed bananas, milk, vegetable oil, eggs, honey and cashew butter.
  • Pour the dry ingredients into the wet ingredients and mix until it just comes together.
  • Finally stir in the chocolate chips.
  • Bake for approximately 25-30 minutes or until golden brown and a skewer inserted into the centre comes out clean. 
Disclaimer: I was sent the my protein products for review purposes. A positive review was not required and all opinions are my own. This is not a sponsored post. 


Monday, 20 April 2015

Quick and Easy Pizza Dough


I love how you can connect with others on social media particularly on twitter. A recent follower on my twitter account is David from Old Fat Guy (@DiscoDavid9)  He lives in Canada and likes to cook. He has lots of great recipes on his site but the one that caught my eye recently was this recipe for Quick Pizza. I'm not a huge lover of pizza and will almost always choose pasta over pizza if we eat at an Italian restaurant. Over the Easter weekend, we did a lot of work around the house and wanted something quick and simple for dinner. Instead of ordering a takeaway pizza, I decided to give David's recipe a try as it seemed so quick and simple. 

It was also a good chance to make use of ingredients in the fridge to use as pizza toppings. I was terrible at shaping the pizza so mine looks quite 'rustic'. Let's just say that was how I intended it to look in the first place :) I rolled out the dough quite thinly as I prefer a thin base pizza and made 2 different ones. The first had a tomato and pepper pesto as a base and was topped with pepperoni, mushrooms, tomatoes, grated cheese and mozarella cheese. The second one had a bbq sauce base and was topped with ham, cheese and tomato. I baked them on my pizza stone and they tasted absolutely delicious! The pizzas were ready in about 35 minutes from start to finish! That's quicker than some pizza deliveries particularly on a busy weekend. This is definitely going on the regular menu plan and it would be great for parties or when I have guests round. 

I'm sending this to Bready, Steady, Go! hosted by Jen from Jen's Food and Michelle from Utterly Scrummy Food For Families. Both Jen and Michelle are keen bread bakers so they've decided to host this challenge together. 


I'm also sending it to Bookmarked Recipes hosted by Jacqueline from Tinned Tomatoes. I bookmarked this and a few other recipes whilst going through David's blog.


It's also perfect for Credit Crunch Munch guest hosted by Michelle from Utterly Scrummy. The challenge is run by Camilla from Fab Food 4 All and Helen from Fuss Free Flavours. Making your own pizza is definitely more cost effective than ordering one for delivery even if you bought all the ingredients from scratch. Hopefully you will have some of these ingredients at home. The bonus is you can custom make your own pizza and not have to pay extra! As mentioned I used up leftovers from the fridge for toppings. 


 mix until the dough starts to clump on the hook

 almost ready - you can see that the dough is smoother and sticks to the dough hook 

 my 'rustic' pizza 

 spread base of pizza on dough 

 add your toppings and bake 

 first pizza - tomato and pepper base with pepperoni,mushroom, tomato and cheese 


  second pizza - bbq sauce base with ham, tomato, mushroom and cheese 

Recipe adapted slightly from Old Fat Guy
I used bread flour instead of plain flour as I'd run out of plain flour (shocking but true) 
My pizzas only needed 8-9 minutes to cook as the dough was very thin and I used a pizza stone. 

240g bread flour (or plain flour), divided into 120g x 2
2.25 teaspoon easy bake yeast 
1 teaspoon sugar
3/4 teaspoon salt
160ml very warm water
3 tablespoons vegetable oil
Pizza toppings of your choice 

  • Place a cold pizza stone in the oven and pre heat the oven to 220C or as high as your oven will go.  
  • Mix 120g flour, yeast, sugar and salt in the bowl of a stand mixer.
  • Add the water and oil to the mixture. 
  • Give it a quick stir then add the remaining 120g flour and place on the stand mixer with a dough hook.
  • Mix until the dough starts to clump on the hook and continue mixing for another 7 minutes. Set a timer and let the mixer do all the work! 
  • Leave the dough to rest for 10 minutes. 
  • Roll out the dough in a circle and toss the pizza if you know how! Otherwise, roll it out thinly into a rustic shape like mine.
  • Transfer the pizza to the hot pizza stone and spread pesto sauce, bbq sauce or pizza base on top of the dough then add the toppings. I found it easier than transferring a ready made pizza to the hot pizza stone. Alternatively you can use a cake lifter or pizza paddle to transfer the ready made pizza to the hot pizza stone. 
  • Bake for about 8-9 minutes or until the cheese is bubbling and the dough is brown on the edges. You may need to bake it longer if your dough is thicker. 
  • Slice and enjoy! 
  • Note: If you don't have a pizza stone, you can bake this on a pizza pan which has perforations to ensure a crispy base.

Sunday, 19 April 2015

Raspberry and Coconut Cupcakes


I made these cupcakes for a charity bake sale at J's work weeks ago. The inspiration for these cupcakes were the Taylor & Colledge flavour pastes that I was sent to review. I'd already tried out the lemon one in this banana and berry lemon muffin recipe which worked really well.  I decided to try the coconut one next and chose to pair it with raspberry. The result was a wonderfully moist, coconuty cake interspersed with chunks of fresh raspberries which cut through the coconut. It was paired with a raspberry jam frosting and had a hidden raspberry inside the cake. I baked 2 batches for the bake sale and a further batch later in the week to take to my work as it was just too good not to share. Everyone was amazed by the hidden raspberry which looks like a heart so I'm planning to make this again for Valentine's Day next year!

I'm sharing this with a few blog challenges this month

Cook Blog Share hosted by Lucy from Supergolden Bakes.


Recipe of the Week hosted by Emily from A Mummy Too


Tasty Tuesdays hosted by Vicki from Honest Mum


Bake of the Week hosted by Helen from Casa Costello 


Casa Costello

 This was for a double recipe 

 Adding coconut extract paste 

 adding fresh raspberries and dessicated coconut

 lovely cupcake batter 

 fresh from the oven

 Make a small hole in th centre using a cupcake corer or melon baller 


 Fill it with a fresh raspberry

 ready to frost 

 pipe icing on and add a fresh raspberry on top and a sprinkling of dessicated coconut 

 I used pink and white spotty cases to match the raspberry and coconut 


 Ta-da! Do you think the raspberry looks like a heart inside? 

Makes 12 cupcakes

For the cupcakes 
130g unsalted butter, softened
125g caster sugar
2 large eggs, beaten
130g self-raising flour
50ml double cream 
1 teaspoon Taylor & Colledge coconut extract
50g desiccated coconut
50g fresh raspberries

For the icing
110g butter
110g seedless raspberry jam
100g icing sugar, sifted

To decorate
24 fresh raspberries
dessicated coconut 

  • Preheat the oven to 180C.
  • Cream the butter and sugar until light and fluffy.
  • Add in the eggs slowly and continue mixing. 
  • Add in the coconut extract, double cream and flour. 
  • Finally stir in the dessicated coconut and fresh raspberries by hand.
  • Fill the cupcake cases until 2/3 full with cake batter.
  • Bake for approximately 18 minutes or until golden brown and a skewer inserted into the centre comes out clean. 
  • Allow to cool completely before decorating.
  • To make the icing, beat the butter and icing sugar until smooth.
  • Add the raspberry jam and continue beating until smooth. 
  • Make a small hole in the centre of each cupcake - you can use a cupcake corer or a melon baller.
  • Place a fresh raspberry in the cored out cupcake.
  • Pipe the frosting on top and decorate each cupcake with a fresh raspberry on top and a sprinkling of dessicated coconut.
Disclaimer: I was sent a range of flavour pastes from Taylor & Colledge for review purposes. A positive review was not required and all opinions expressed are my own. This is not a sponsored post.